Uploading a server build
Next you need to export your game and upload it to the W4 Cloud!
Setting up a dedicated server export
A dedicated server build is a normal Linux export, with a special dedicated server "Export Mode" (so that it defaults to running headless), and the art and sound assets (optionally) stripped or removed.
To set one up in the Godot editor:
Click "Project" -> "Export..." from the main menu
Click "Add..." and select "Linux/X11" from the dropdown.
Even if you already have a Linux export preset, it's recommended to create a new one for your dedicated server build, so that you can change the "Export Mode".
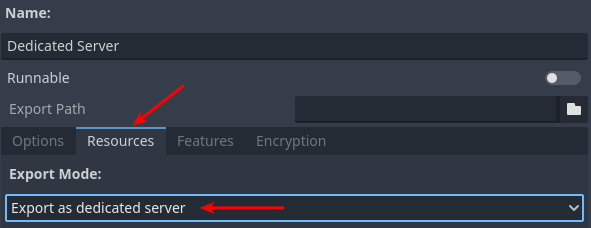
Change the "Name" to something like "Dedicated Server"
Click the "Resources" tab and change the "Export Mode" to "Export as dedicated server".
(Optional) Look through the the "Resources to export" list and change how art and sound assets will be included or excluded.
"Strip Visuals" vs "Remove" vs "Keep"
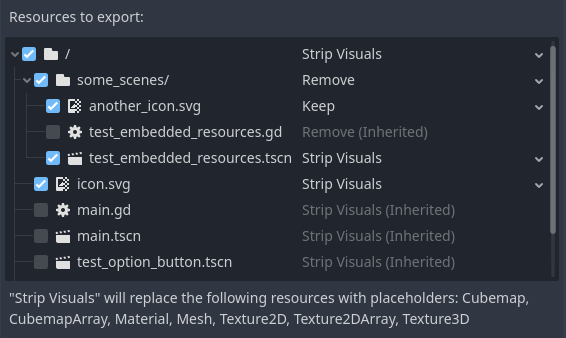
The "Resources to export" list provides you with three possible options for each file in your project:
- Strip Visuals
This will replace some art and sound resources with "dummy" versions, that only contain size information, but not the actual data.
This will also affect resources that are embedded in scenes or other resources.
- Remove
This will remove the file from the export entirely.
Use this with care! If you preload() or load() any of these resources, you'll get a error when running your game.
- Keep
Don't strip or remove the given resource - keep it as-is in the dedicated server export.
If you select one of these options on a directory, it will cascade down to all the files and directories within, inheriting the selection.
However, you can override the inherited value by checking a file or directory, and making a different selection. In the case of a directory, this new selection will cascade down to the contained files and directories, unless any of them are overridden.
Uploading to W4 Cloud
There are two ways to upload the server build:
From Godot, using the plugin UI.
From your workspace dashboard, using the web UI.
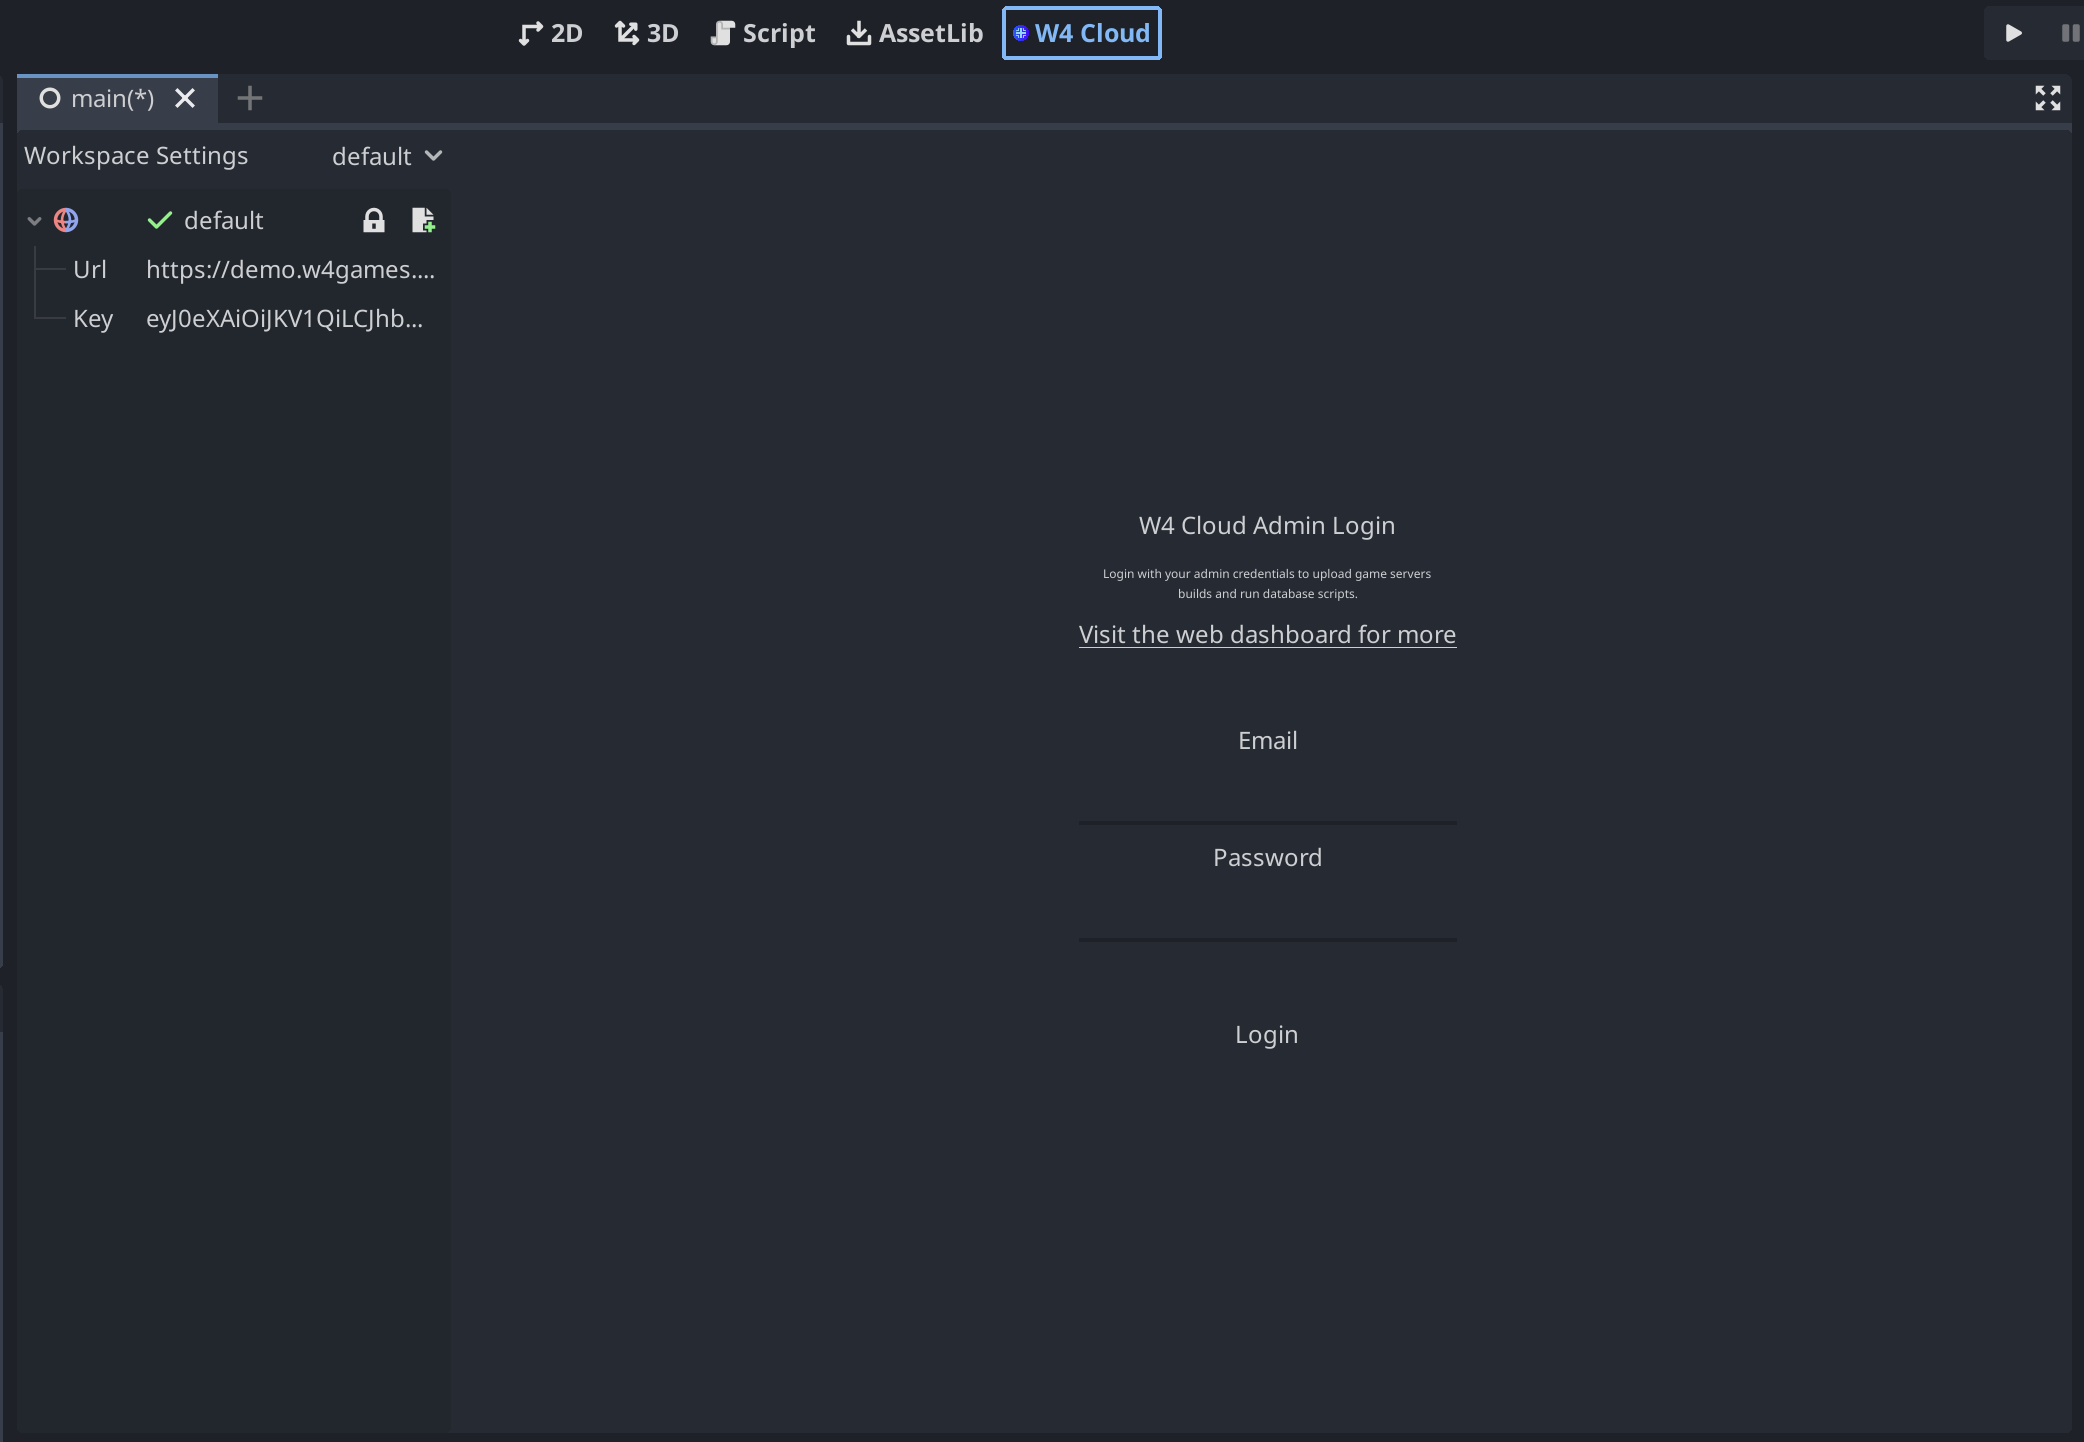
Upload the build from Godot
In Godot, go to the W4 Cloud screen, and log in using the same credentials you use to log in to your W4 dashboard:
After you log in, you will be able to enter the export settings:
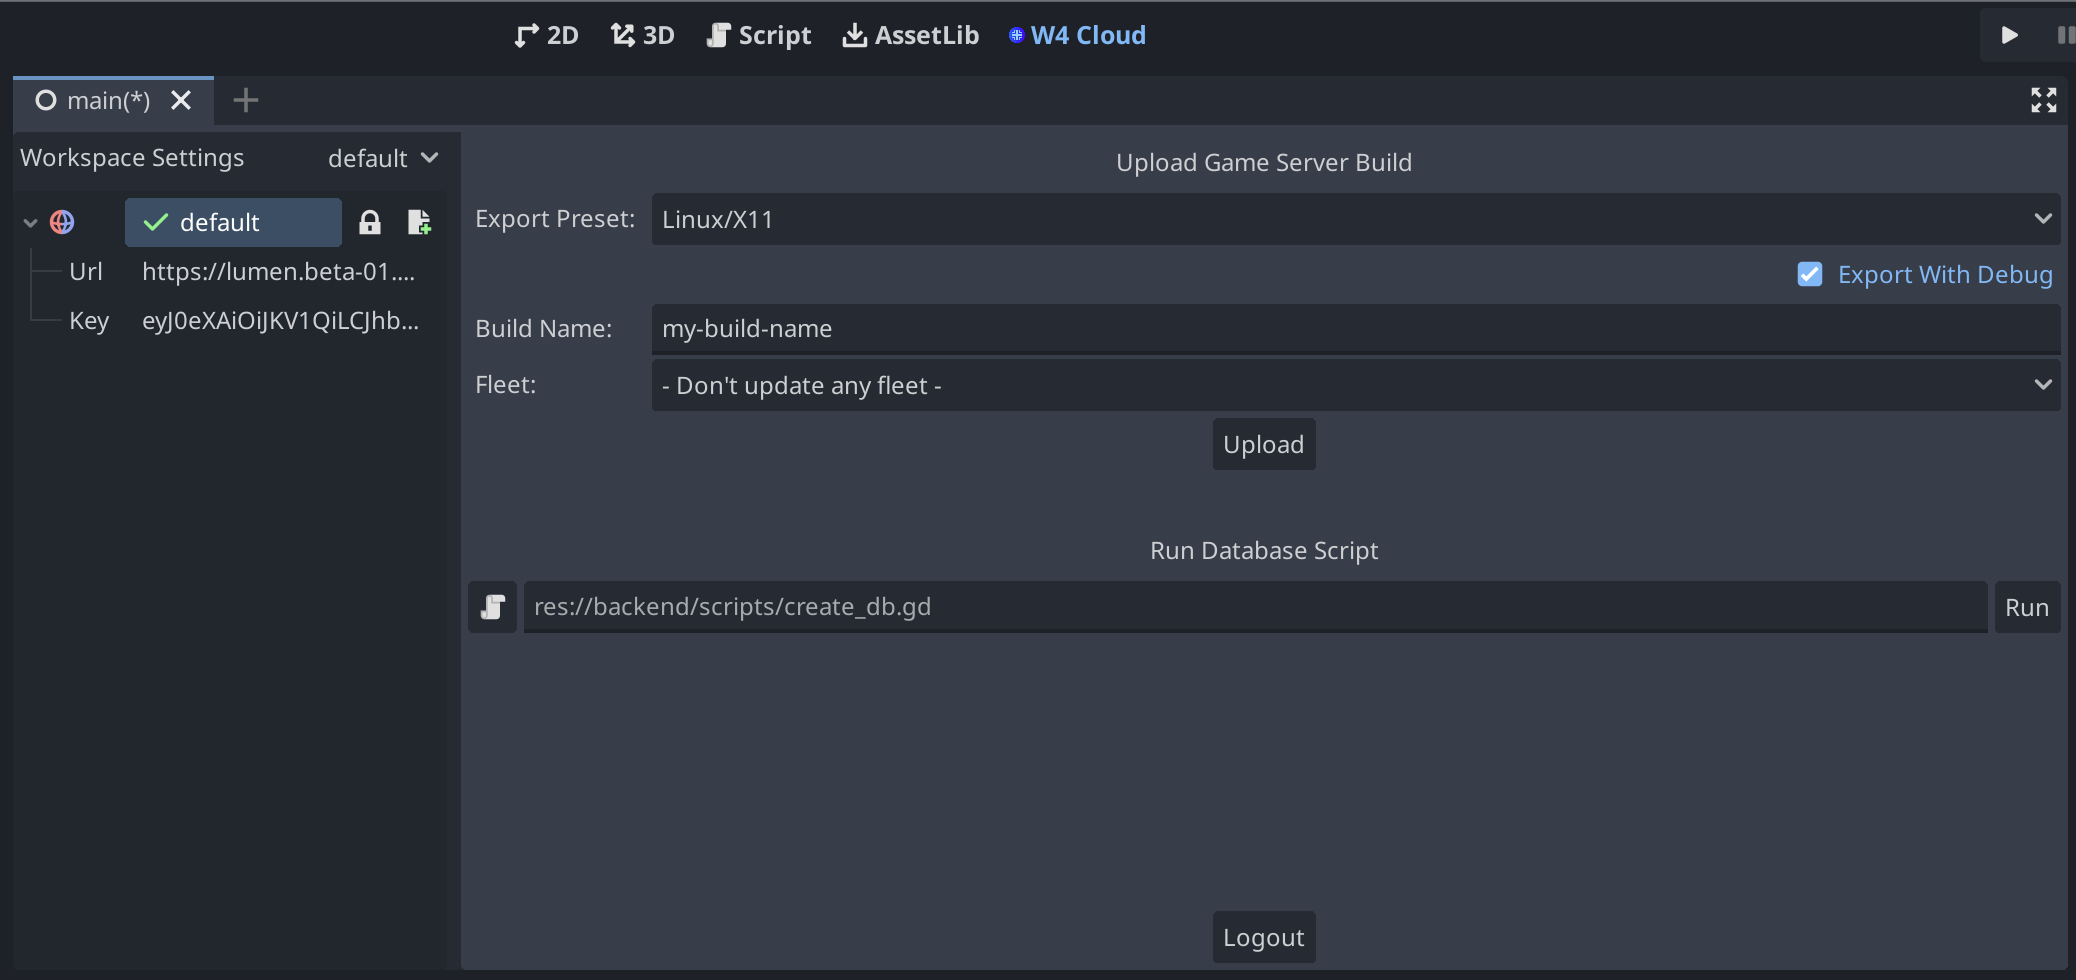
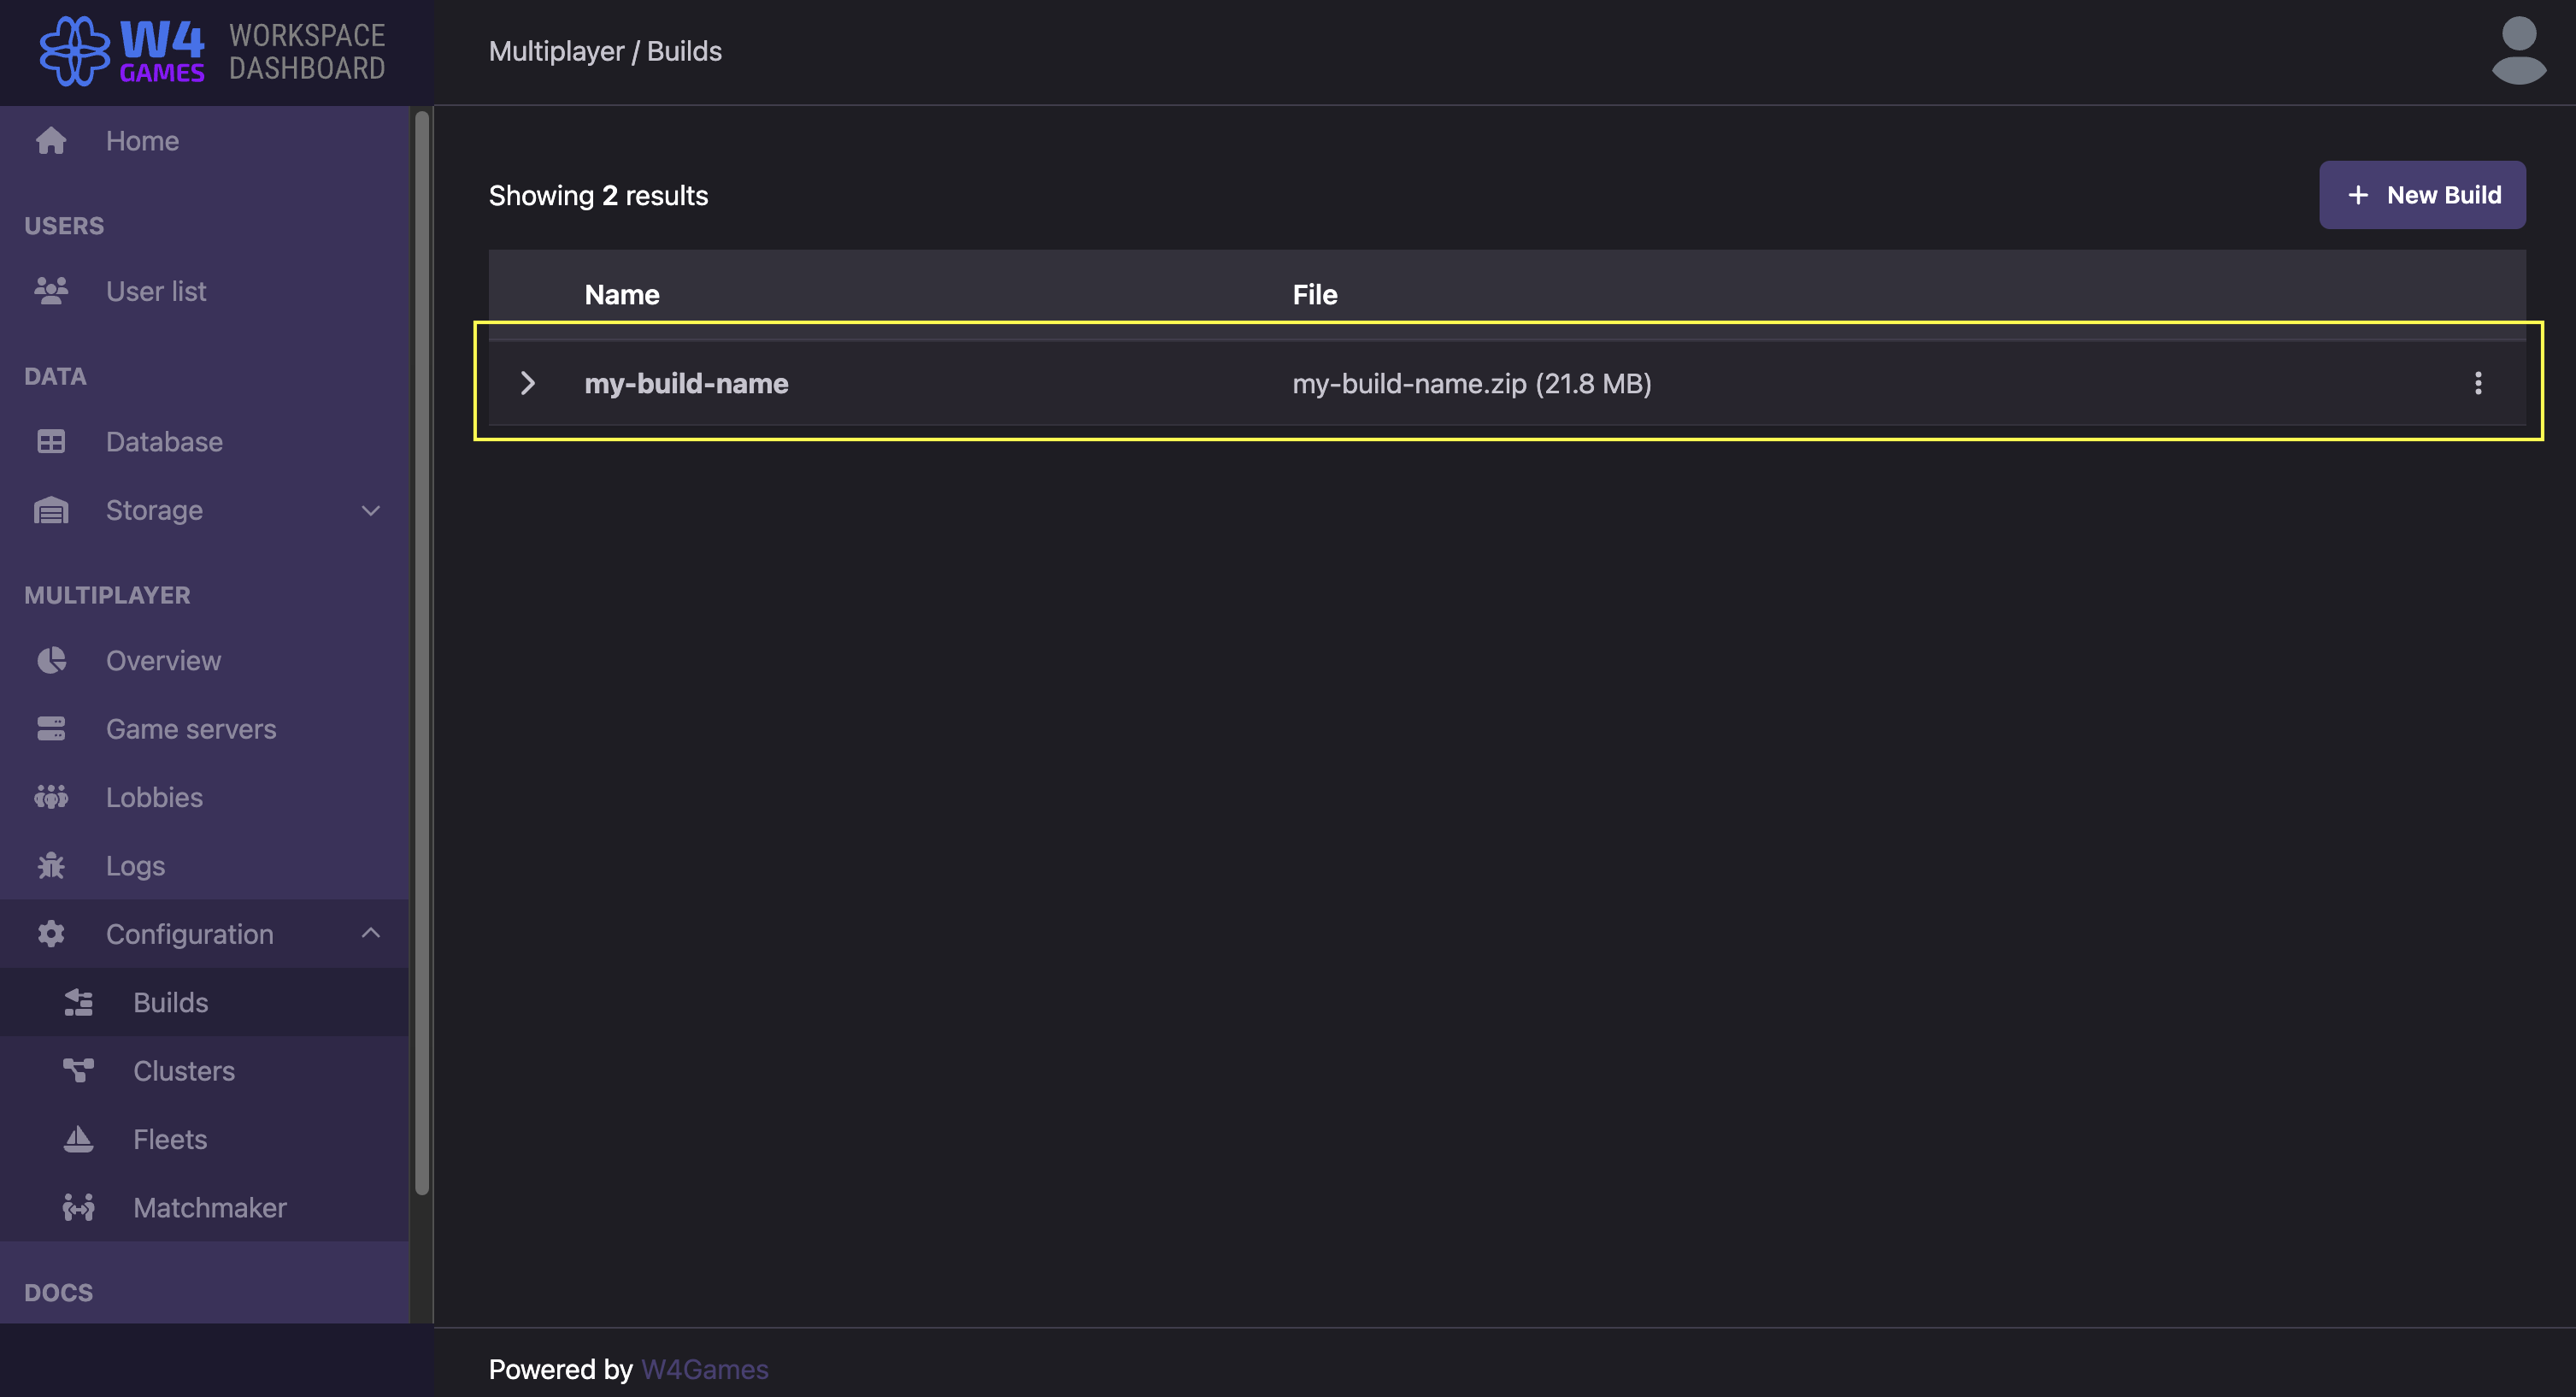
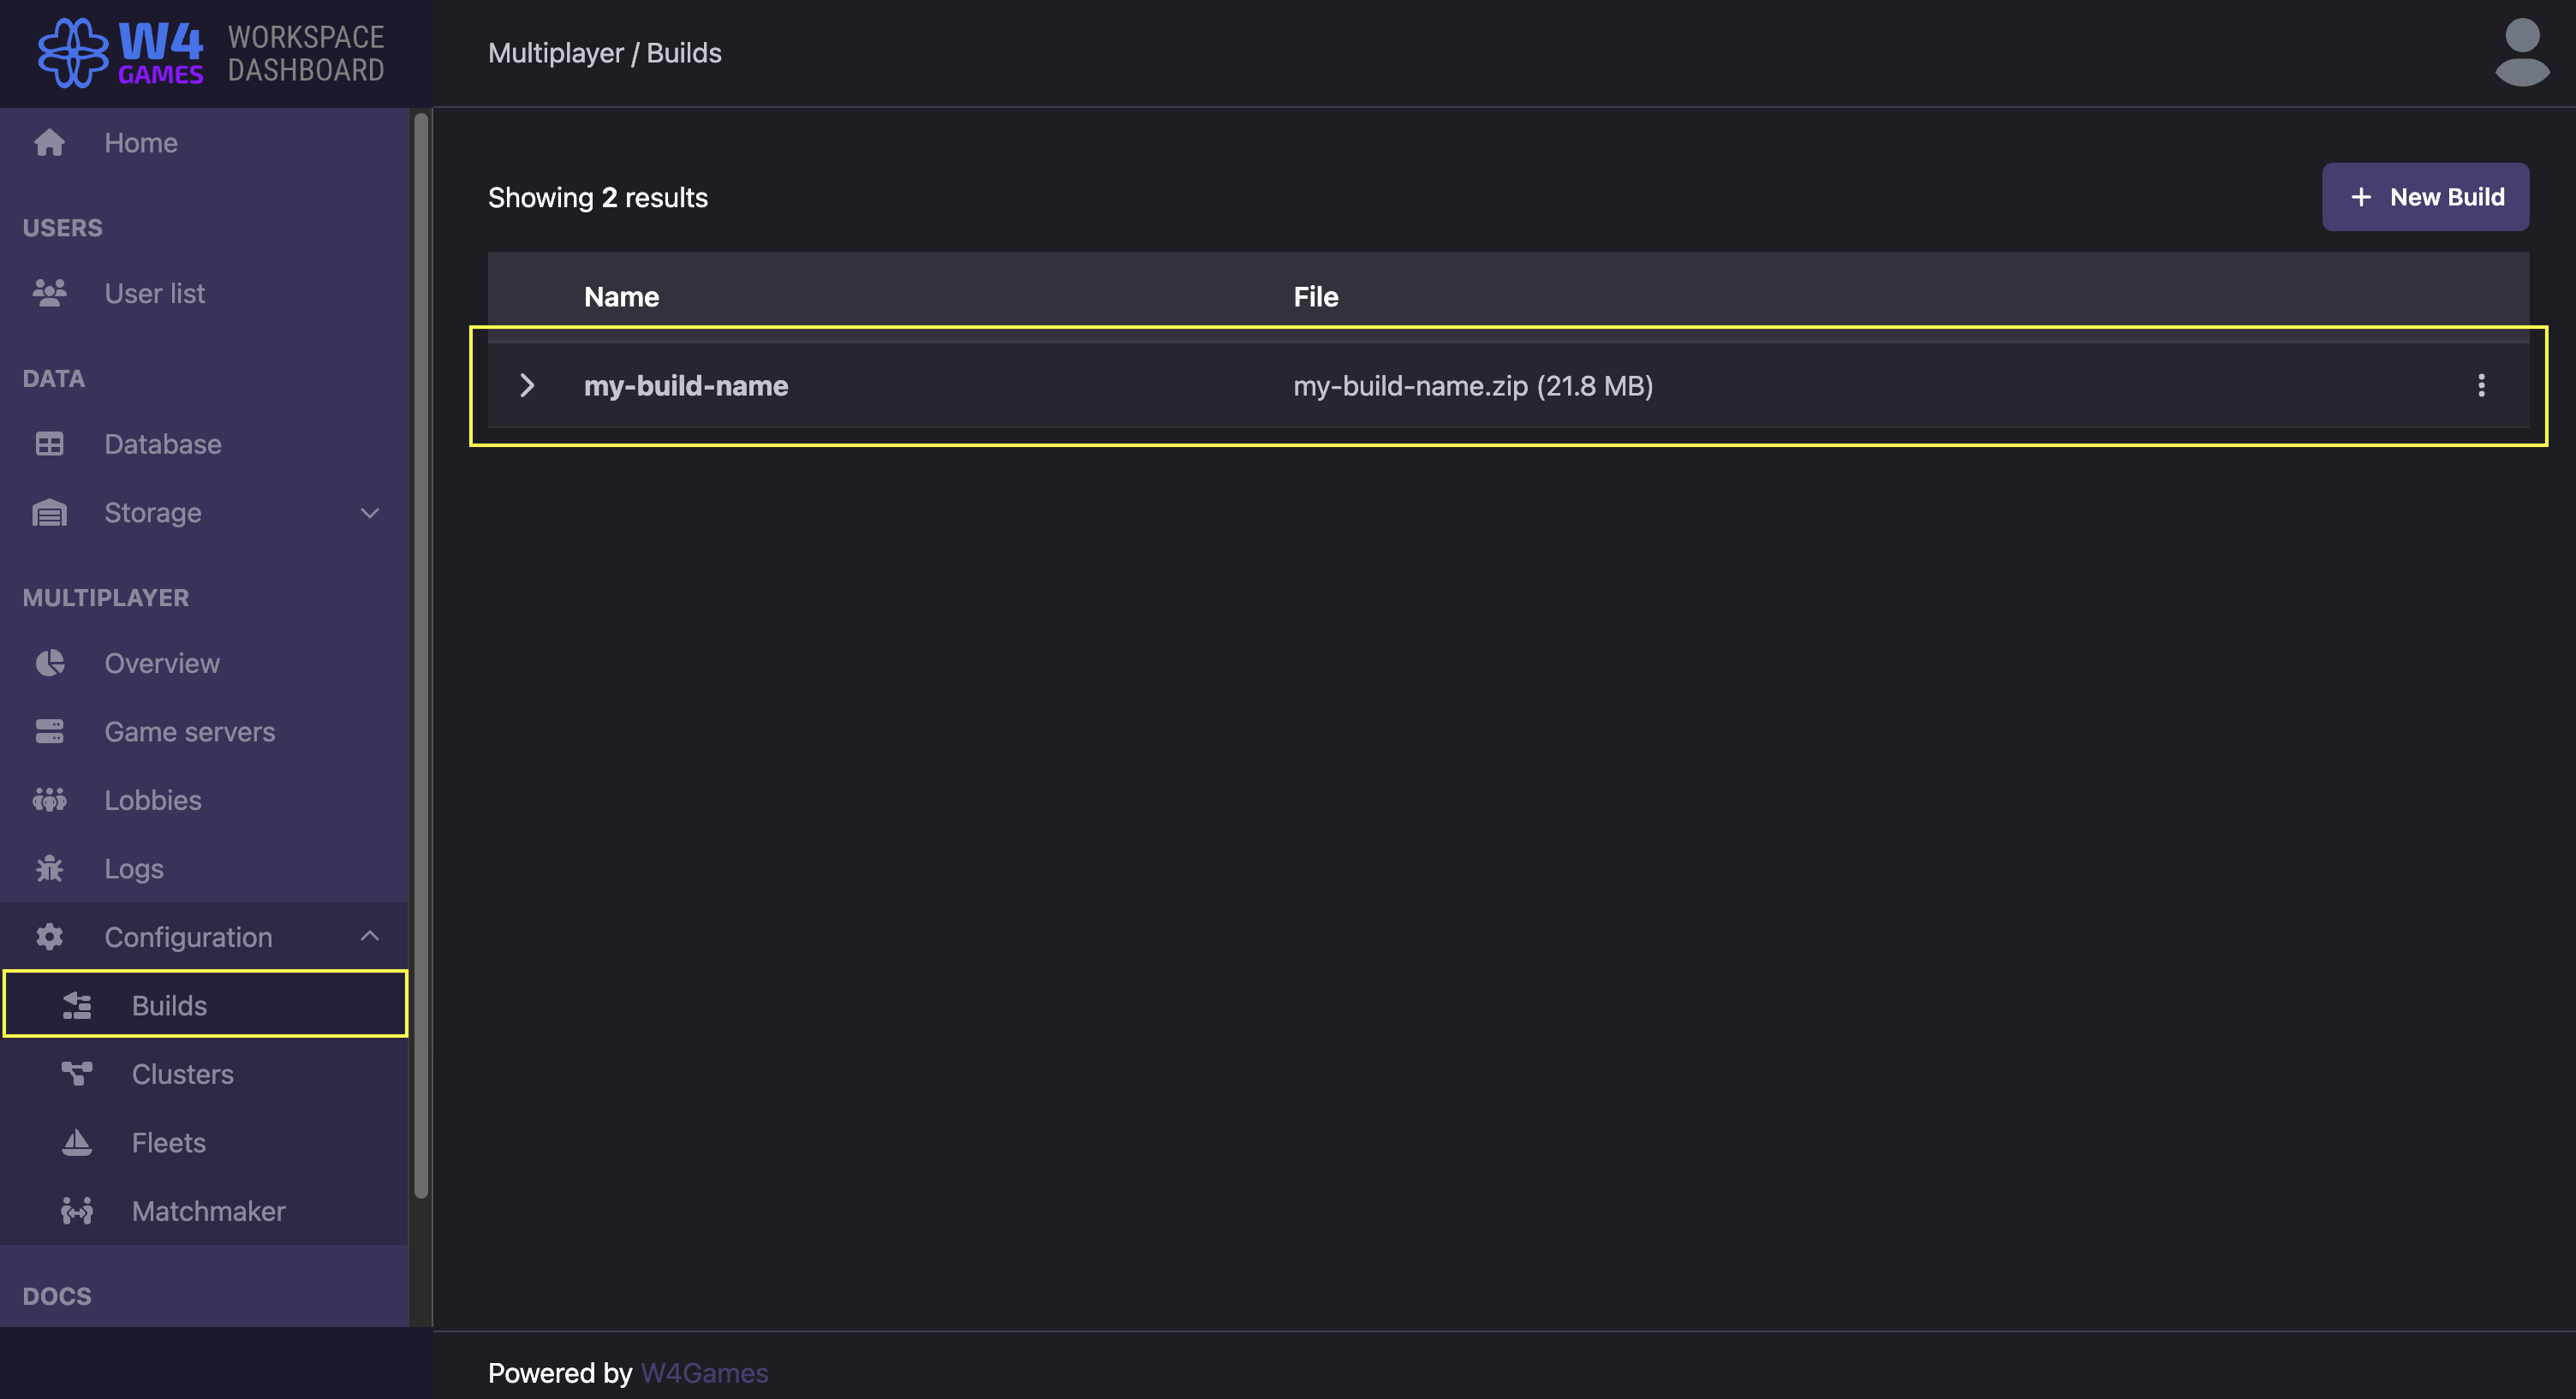
Select the export preset you have created, enter the Build Name, and click Upload. Once the uploading is finished finished, you will see the uploaded build on the Builds page of your dashboard:
Upload the build from the workspace dashboard
Go to Project > Export..., click the Export Project... button, and save it as a zip file to the location of your choice.
Then, open your workspace dashboard, navigate to the Configuration > Builds page, and click the New Build button:
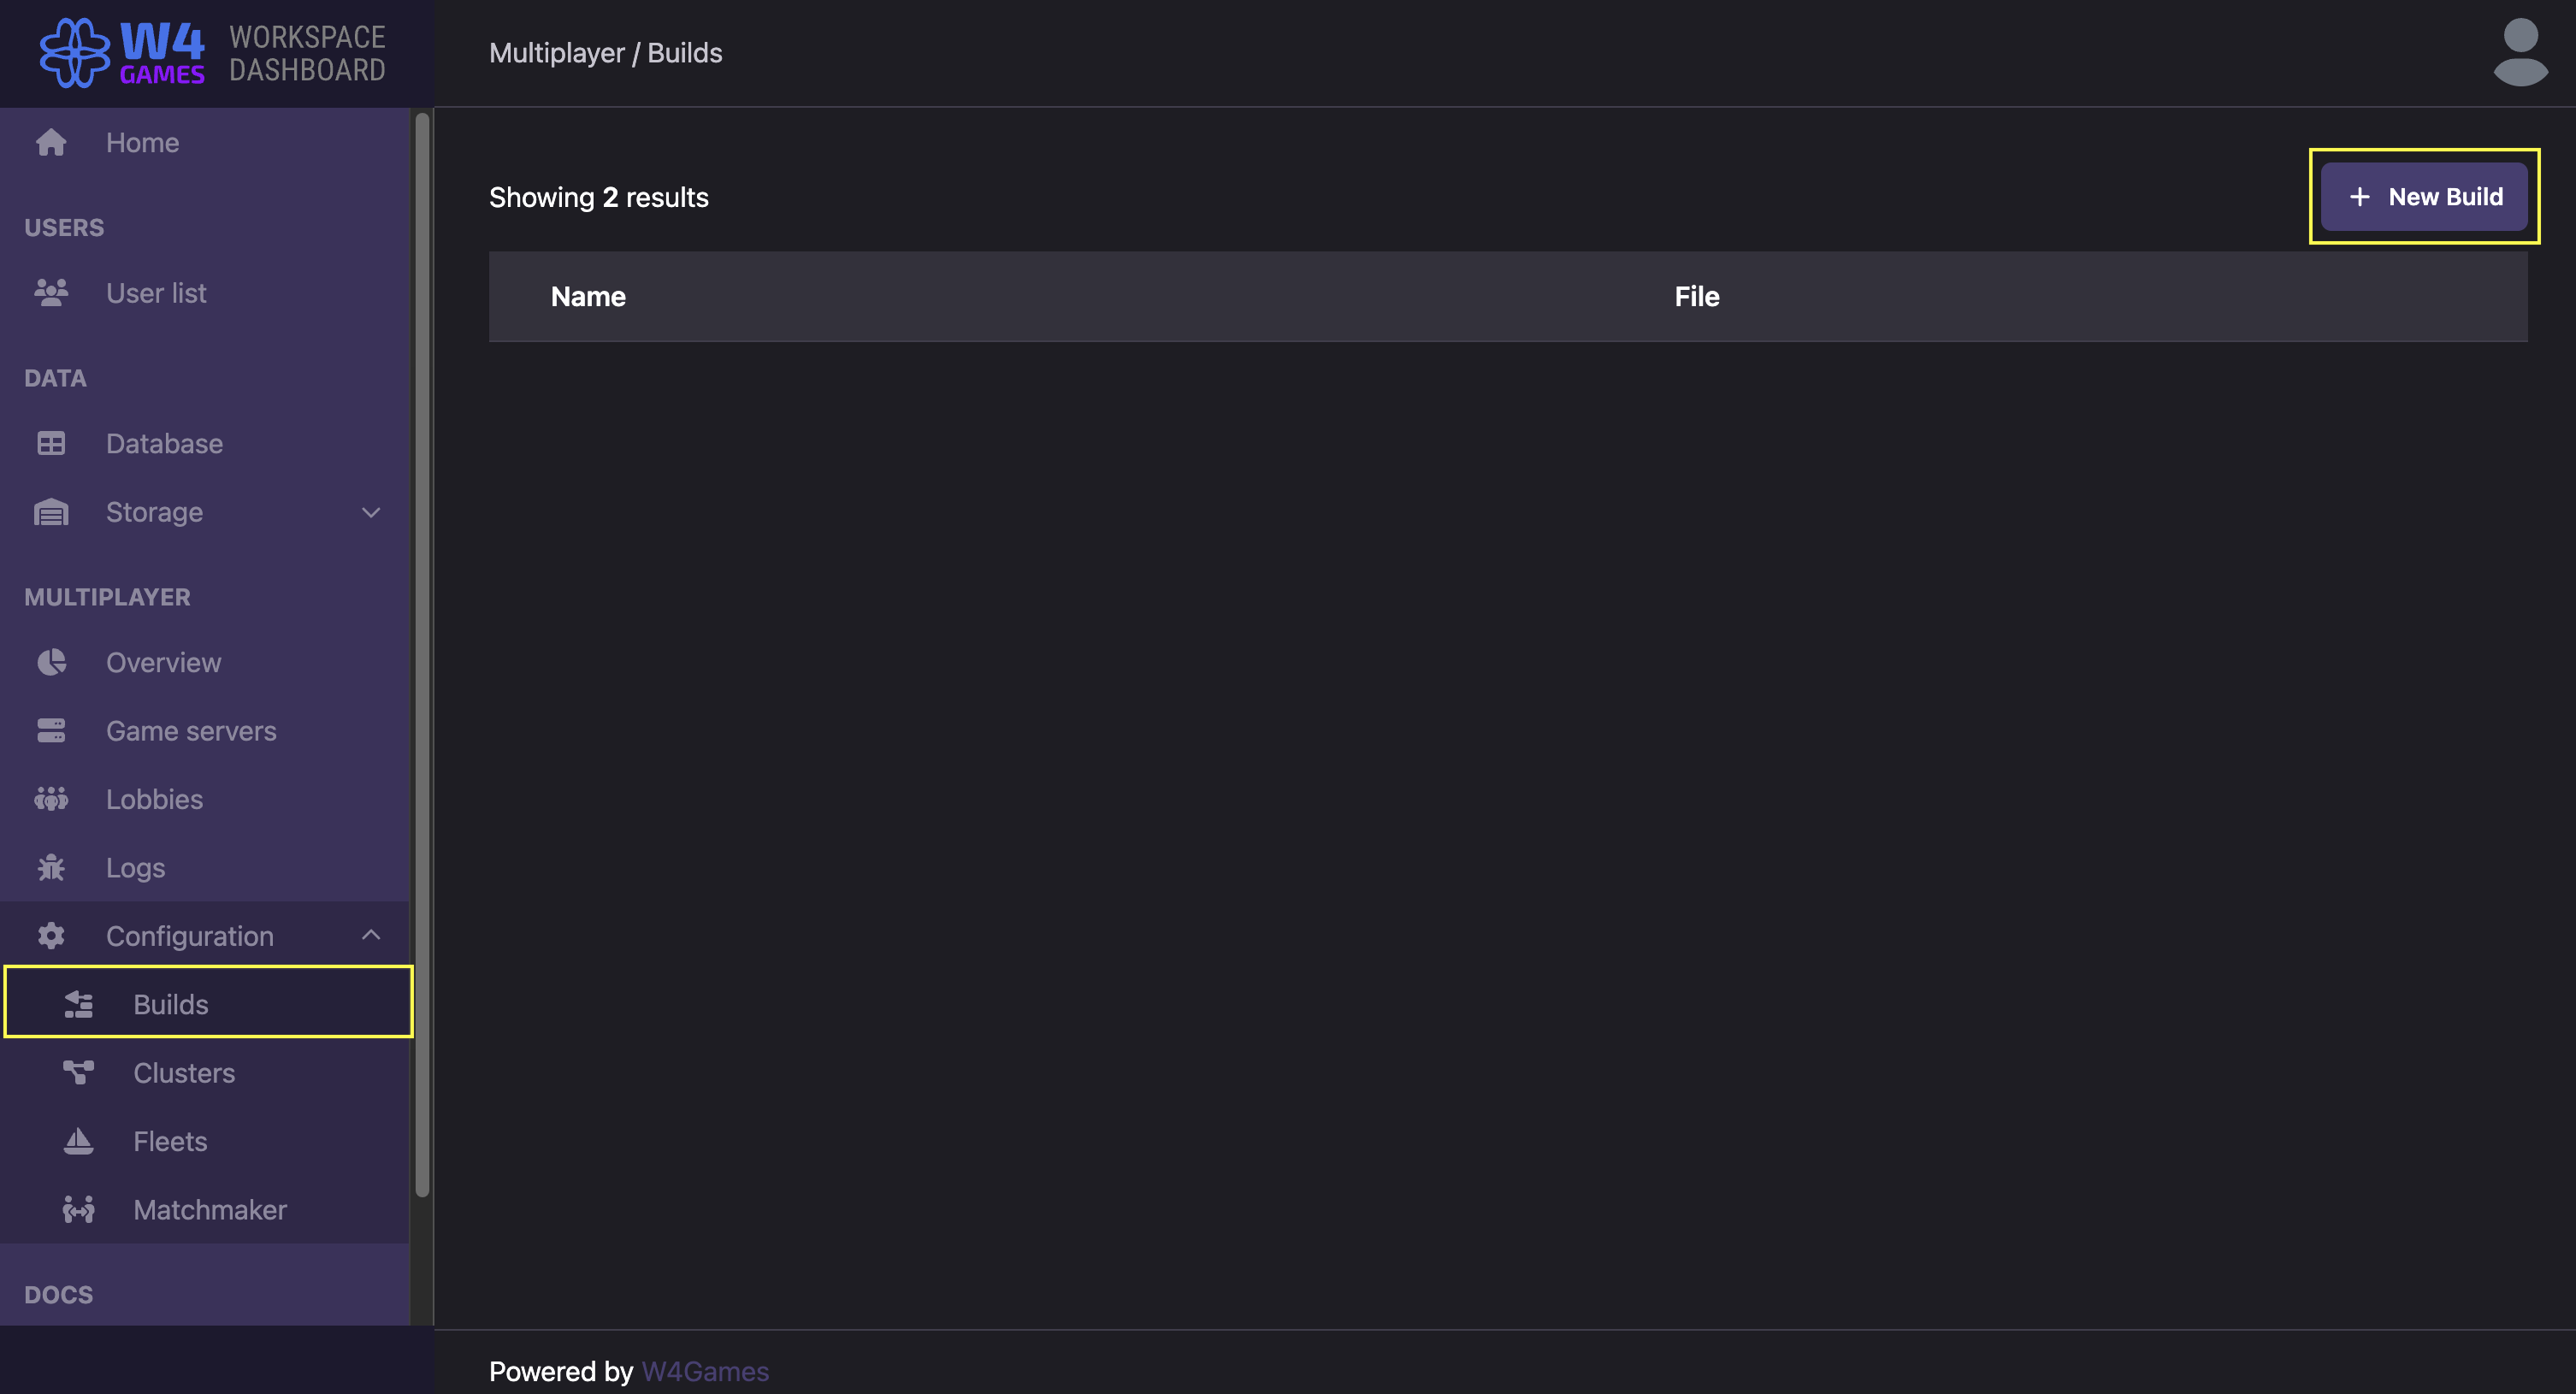
You will see a form that enables you to create a new build. Upload the zip file you have created, and click Save changes. You will see the new build in the list of available builds: