Publishing different game versions
In this guide, you'll learn how to set up different versions of your game published simultaneously, like a stable release and a development build.
Here's how you can do this:
Create a globally accessible version variable.
Create lobbies that target that version tag.
Create a fleet that uses that version tag.
Let's go through those steps.
Defining a Globally Accessible Version
There are many ways to define a globally accessible version tag in Godot.
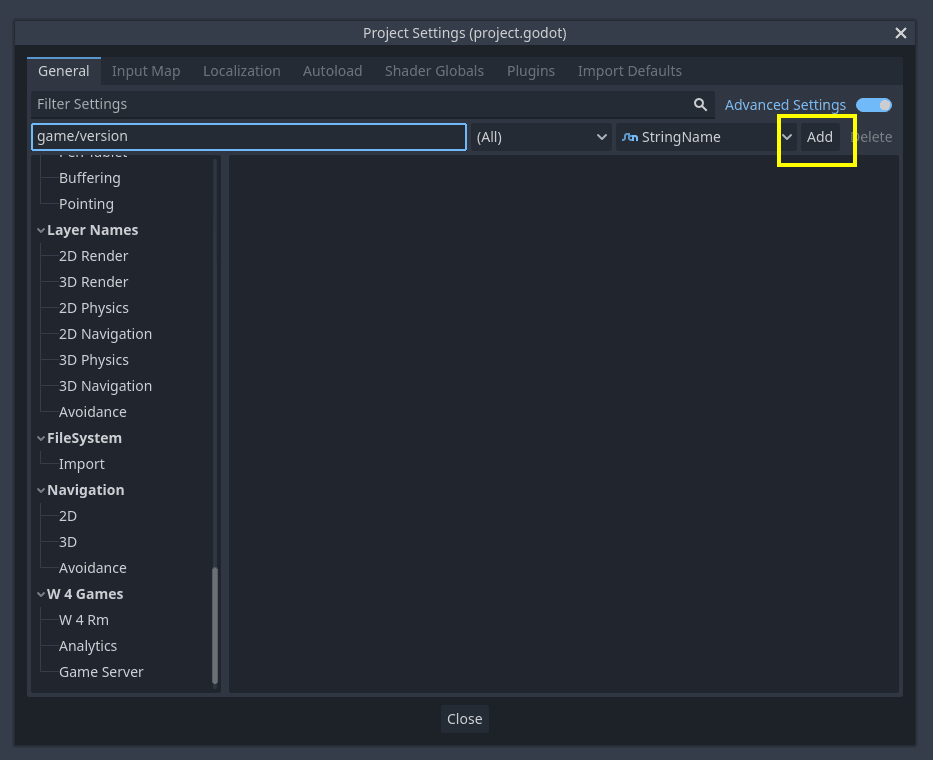
One simple way would be to add your version tag to the ProjectSettings singleton.
Open the project settings in Godot and create a new value game/version of
type StringName:
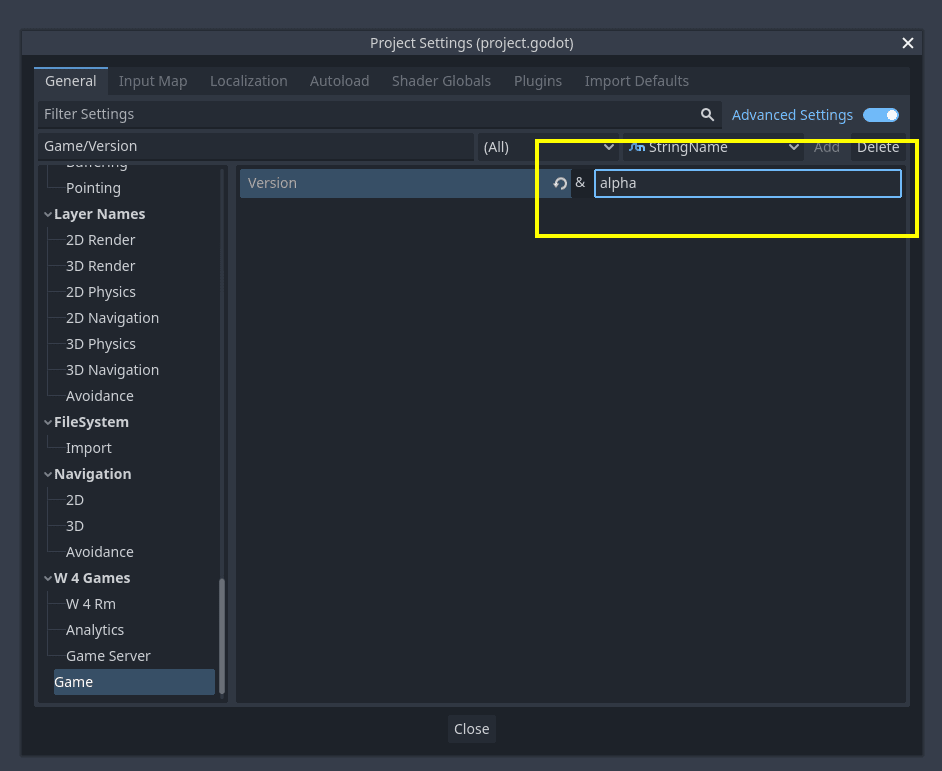
Then, scroll down to the setting and write your version name. It could be
anything. Common names follow semantic versioning,
like as 1.0.0 or 0.1.0-alpha. I'm calling mine just "alpha"
for simplicity.
From now on, we can always access this value in our project with
ProjectSettings.get_setting("game/version", "").
Note
If you're using Continuous Integration, you can generate an
override.cfg that can set this version without changing the
original project.godot.
Create a build
We will change our code in two places: when creating a lobby, and when listing lobbies.
In the function create_lobby, we will add those lines:
func create_lobby(cluster: String) -> bool:
    last_error = ""
    await leave_lobby()

    var player_name := ProfileData.restore().player_name

    await DatabaseManager.set_own_username(player_name)

+   var version: String = ProjectSettings.get_setting("game/version", "")

    var result = await W4GD.matchmaker.create_lobby(
        W4GD.matchmaker.LobbyType.DEDICATED_SERVER,
        {
            max_players = MAX_PEERS,
            cluster = cluster,
            props = {
                lobby_owner_username = player_name,
+               version = version
            }
+           fleet_labels = {
+              version = version
+           } if version else null,
        }
    ).async()
    # ... rest of the code unchanged
The version property will allow us to search for lobbies having
this property.
The fleet_labels key ensures we can only select fleets with those
specific properties.
This ensures we create lobbies in one of the fleets marked with this version. The fleet doesn't exist yet, we will do this later.
We also need to filter lobbies when searching for them. In the
get_lobbies() function, add:
func get_lobbies() -> Array[W4Lobby]:
    last_error = ""
    var lobbies: Array[W4Lobby] = []

+   var version: String = ProjectSettings.get_setting("game/version", "")

    var result = await W4GD.matchmaker.find_lobbies({
        include_player_count = true,
        only_my_lobbies = false,
        constraints = {
            "state": [W4GD.matchmaker.LobbyState.NEW],
            "player_count": {
                op = ">",
                value = 0,
            },
+           version = version
        },

        }).async()
    # ... rest of the code unchanged
This will ensure we only look through lobbies marked with the correct version.
Upload a build
We will upload a build without a fleet, since we'll make the fleet at the end.
Go to the W4 Cloud screen, and log in using the same credentials you use to log in to your W4 dashboard.
Select your export. Feel free to name the build as you wish, but using
the version makes it easier to manage and find later. I called mine
version-alpha to make it stand out.
Note: Do not select a fleet:
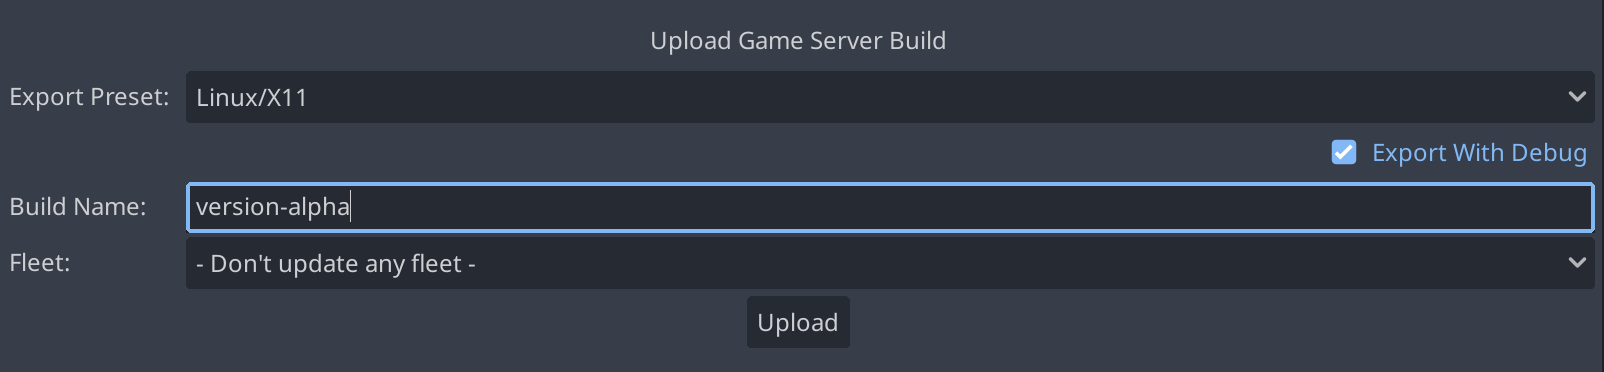
Press "Upload". We're almost done!
Create a Fleet
Finally, let's create a fleet.
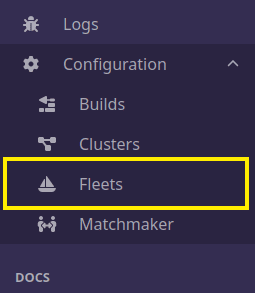
In your W4 dashboard, select Configuration > Fleets:
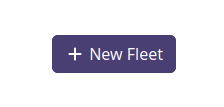
Press the "new fleet button:
Select whatever you want as a name. Again, I called it version-alpha
for consistency.
Use the same port we used, 10567.
Select the build we just made.
In the "labels" section, write "version" as a key, and, as a value,
select your current version; in my case, "alpha":
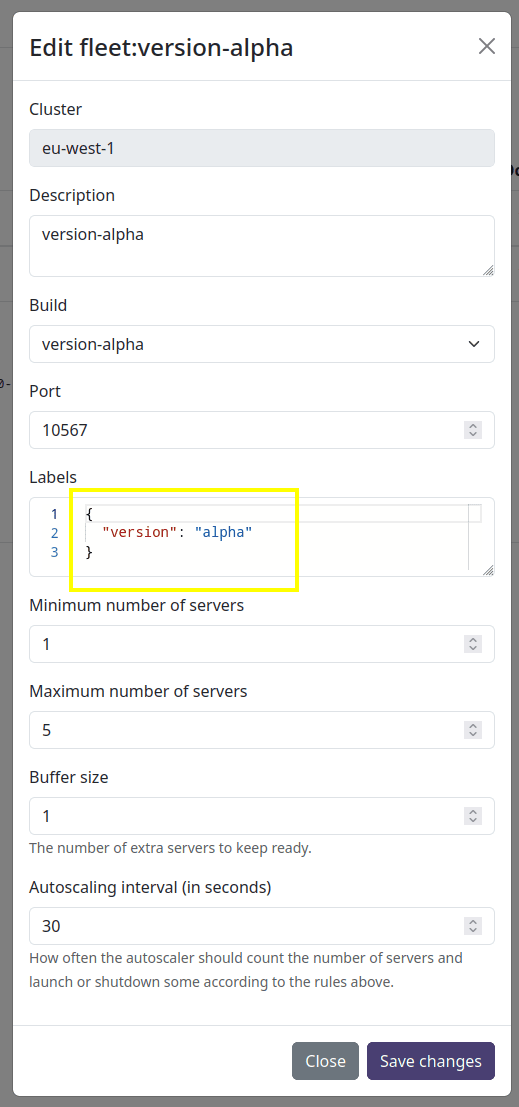
Then, press "save changes"
That's it! Now people who run that specific version will only be able to connect to this specific fleet.
Recap
How is the magic happening?
- When your player creates a lobby, the key
fleet_labelsinstructsW4 to create that lobby specifically in any fleet with the specified fleet labels.In our case, theversion. - We were careful to upload a server version build that matches this clientversion.
This ensures the client and the server are the same version.
Then:
- When the lobby is created, we also add a custom
versionproperty. This propertyallows us to filter lobbies with this specific version. - When your players search for lobbies, the
versionkey filters lobbies to keep onlythose with the proper version property.
This ensures the host client and all other clients also use the same version.
That is how you can ensure only compatible clients and servers can play together!
Now that you understand the basics of this system, you can extend it to support any complicated combination of tags you like!