Exploring the start project
In this series, we provide you with predefined assets and the game's base code so we can focus on W4 Cloud's networking features.
You can download the project files on the project's GitHub repository: Hexagon Multiplayer Releases
To download the project, after clicking the link above:
Look at the latest release, at the top of the page.
Under Assets, download the
hexagon-series-start.zipfile.Extract the archive to a folder of your choice.
Open Godot, and on the right of the project launcher, click the Import button.
Navigate to the folder you extracted from the ZIP archive, and import the
project.godotfile it contains.
Note
If you try to run the project's main scene by pressing F5 now, you will get errors. This is completely normal as the project is set up for online multiplayer and we will add the missing pieces in the series.
The project opens on the Boot scene. It's a small scene that loads a different scene depending on whether the game is running on a player's machine or the server, using the following code.
You'll generally want to run different code on the server and on players' machines. In Godot, you can do that with scenes.
# The scene to run when the game is running on the server.
const ServerScene = preload("res://server/server.tscn")
const LobbyScene = preload("res://lobby/lobby.tscn")

func _ready():
    if GameState.is_server():
        get_tree().change_scene_to_packed(ServerScene)
    else:
        get_tree().change_scene_to_packed(LobbyScene)
Notice the use of the GameState.is_server() function. It's a function that
we will write in this series.
First, a taste of Gameplay
Let's give the game a quick try in solo to get a feel for it.
Find the scene Level/level.tscn and open it.
Game controls:
Click on the game window to capture the mouse.
Press Esc on your keyboard to release the mouse.
Press W A S D to move.
Press the Spacebar to jump.
Drag the mouse to orbit the camera.
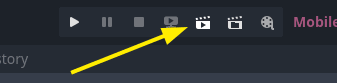
Run the scene by clicking the Run Current Scene button in the top-right or by pressing F6 on your keyboard.
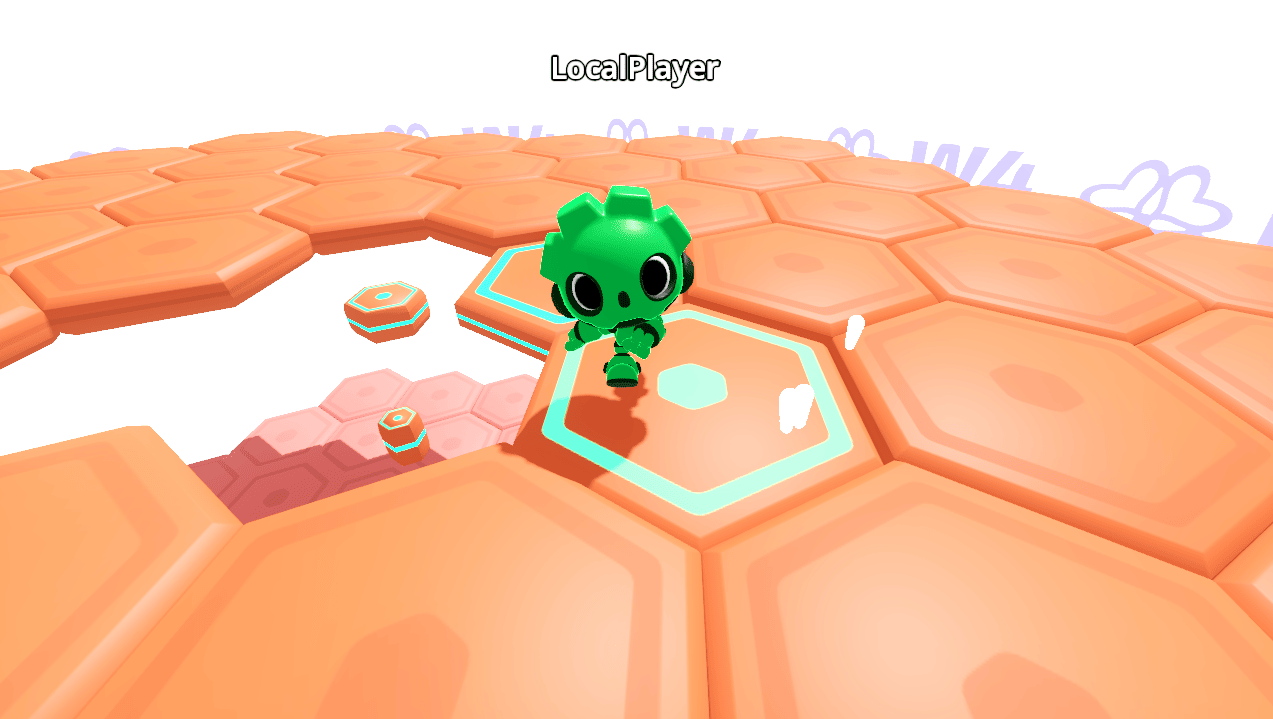
You will be presented with a single-player mode of the game. You cannot win! Since you're the only player, you will always end up dying.
Once you're done, close the game window or press F8.
Solo and multiplayer node setups for gameplay
Let's look at how the player avatar is set up to support online multiplayer.
The setup we'll present next follows the Multiplayer Article from the official Godot website. If you've never made any multiplayer game in Godot, feel free to go check it out first!
To make the game work with networking, we've set up the player character's scene a little differently than we would for a single-player game.
In a single-player game, we can bunch the character, the camera, and the controls in a single scene.
But when handling multiple players, we have different requirements. As we said before, we want to send the inputs to the server and receive positions back.
So, we need to separate the code that handles player input from the code that moves their avatar.
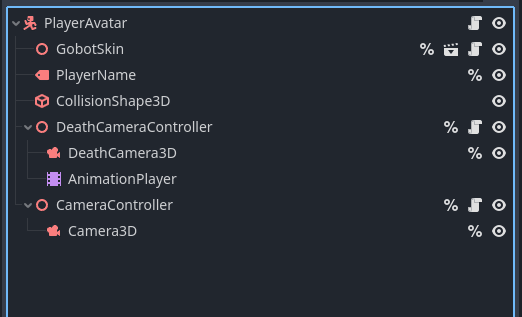
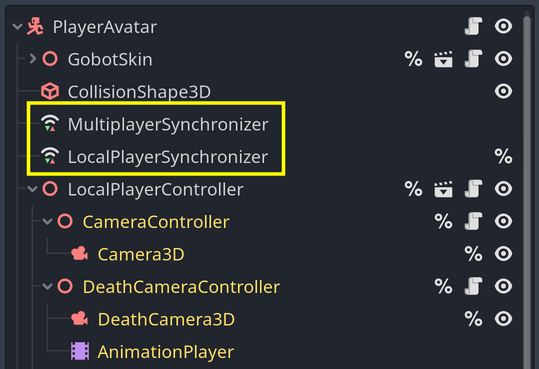
Here's the scene we use for playable characters in this Hexagon game. In
Godot, open the scene player/player_avatar.tscn to inspect it.
Notice the LocalPlayerController node. It stores the player's input and moves the camera.
Note
You'll notice a couple more nodes in the editor compared to the screenshot. They have to do with audio and 3D text display, which we're not interested in here.
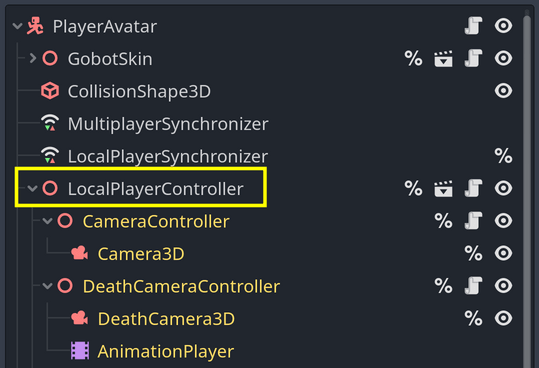
To synchronize the LocalPlayerController node's input with the server and other players, we use Godot 4's handy synchronizer nodes. These nodes greatly simplify the process of sending and receiving data from the server.
Once we've set up the game's networking code, the LocalPlayerSynchronizer node will send updates about the LocalPlayerController node to the server.
The MultiplayerSynchronizer will receive updates from the server and move the avatar accordingly.
In the scene, you can select each of the two synchronizer nodes to see the synchronized properties in the Replication bottom panel.
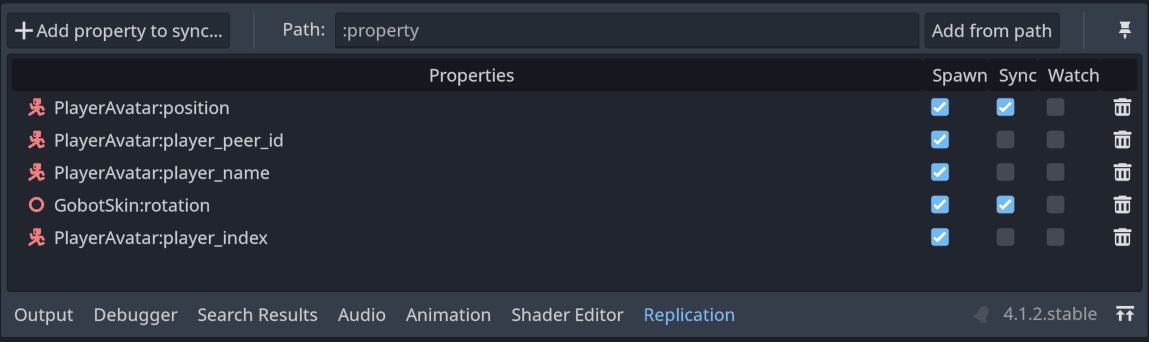
You may notice that the camera setup is the same in both screenshots. We do not care about synchronizing the camera; each player can control their camera freely. So the camera input can run locally on the player's machine.
Here's a diagram to recap how the player's avatar is set up for online multiplayer:
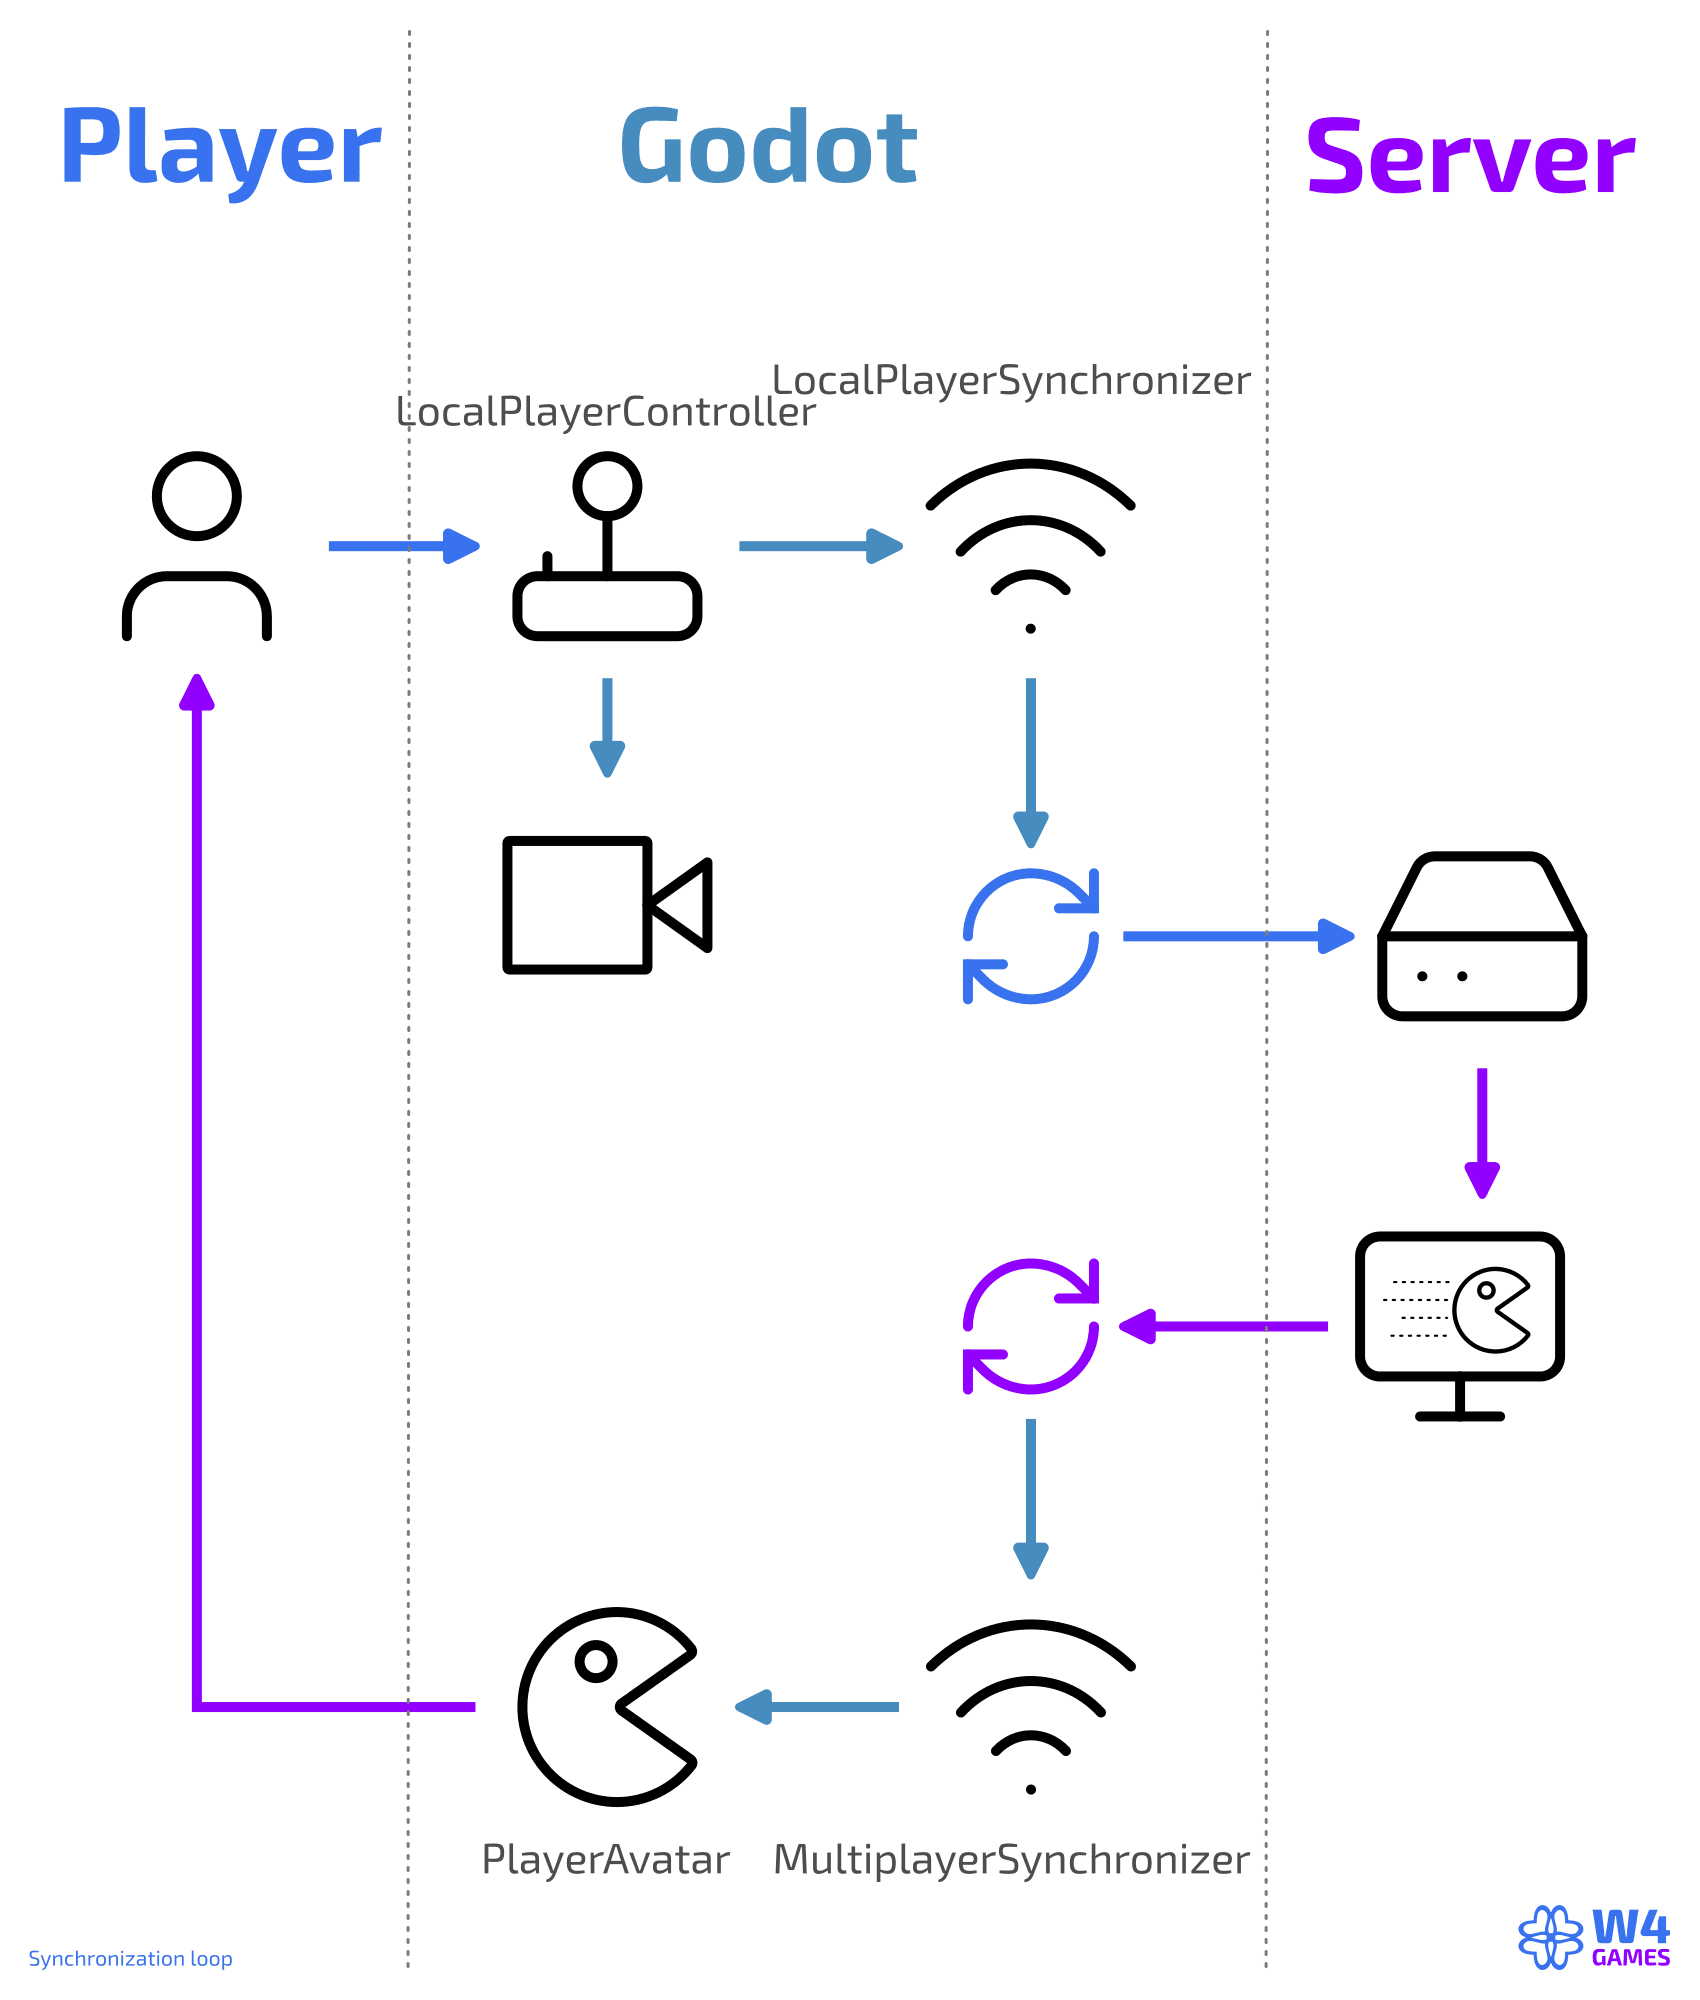
To move:
The player controls the
LocalPlayerController.The
LocalPlayerSynchronizersynchronizes theLocalPlayerControllernode with the server.The server uses its copy of the
LocalPlayerControllernode to process inputs and move the player avatars.The server sends positions back to the
MultiplayerSynchronizernode.On the players' machines, the
MultiplayerSynchronizernode receives positions from the server and moves the avatars locally.
The player sees the game moving and sends new inputs, and this exchange continues in a cycle.
And that's our gameplay's multiplayer setup!
Note that the server is not a player. It only takes care of moving all the players.
In other networking tutorials, you may see people making one of the players authoritative. But for hosted games, you usually want the server to control everything and to keep all players equal to limit the risk of cheating.
Authentication and lobby selection
For everything that has to do with authentication and matchmaking, the
user interface's logic lives in a user interface scene,
lobby/lobby.tscn.
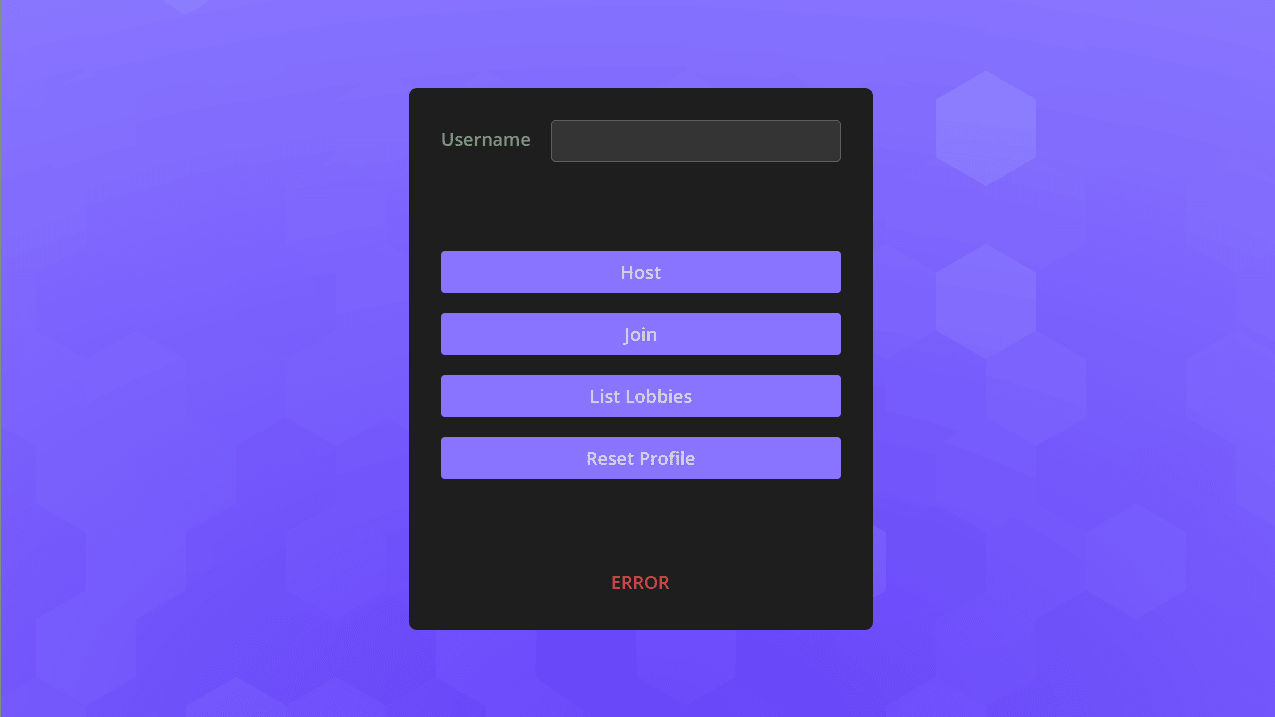
The Lobby scene mostly has user interface code and will call functions from a
GameState autoload that we'll code in this series. In this autoload, we'll
write all the code that makes network requests to W4: authentication, getting
the list of available lobbies, joining a lobby, etc.
GameState will be a thin wrapper over the W4 API that we use to make the
series easier to follow. It helps us encapsulate network requests and separate
them from user interface and display-related code. In your projects, you could
have much of its code outside of an autoload if you want to avoid global
objects.
In summary
Here's a quick summary of the essential scenes in the project:
The scene
player/player_avatar.tscnrepresents and handles moving the avatar. It separates input handling from movement.The scene
player/local_player_controller.tscnhas provisions for capturing input, moving the local camera, and activating the death camera (which orbits around the stage when the player died).The scene
lobby/lobby.tscnwill authenticate players, and it provides a menu to log the player in, displays lobbies, and allows players to join a lobby.The W4 SDK allows us to link the lobby with W4 Cloud.
We'll code an autoload,
game_state.gd, that'll wrap W4 Cloud's API to expose simple functions and make following the tutorial easier.
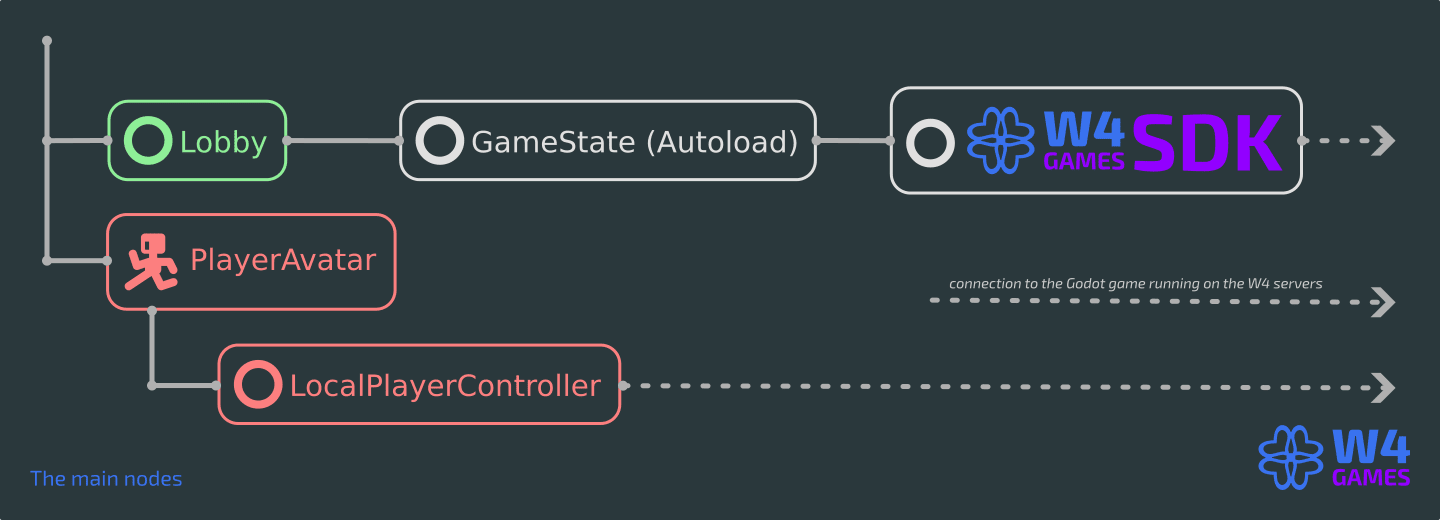
Almost all the code we will write will be in game_state.gd.
In the next part, we'll download and install the W4 add-on. And then, we'll start coding!