Adding W4 to the project
Now we got a good sense of the project, let's get coding and make it work with W4 cloud.
Over the next few pages, we will:
Install the W4 addon.
Authenticate users.
Use the W4 ORM (Object-Relational Mapping) to add a
Profiletable linked to users.Set up matchmaking using lobbies.
Set up the game server.
Set up the clients so they can join.
Upload a build on W4 cloud so we can finally play.
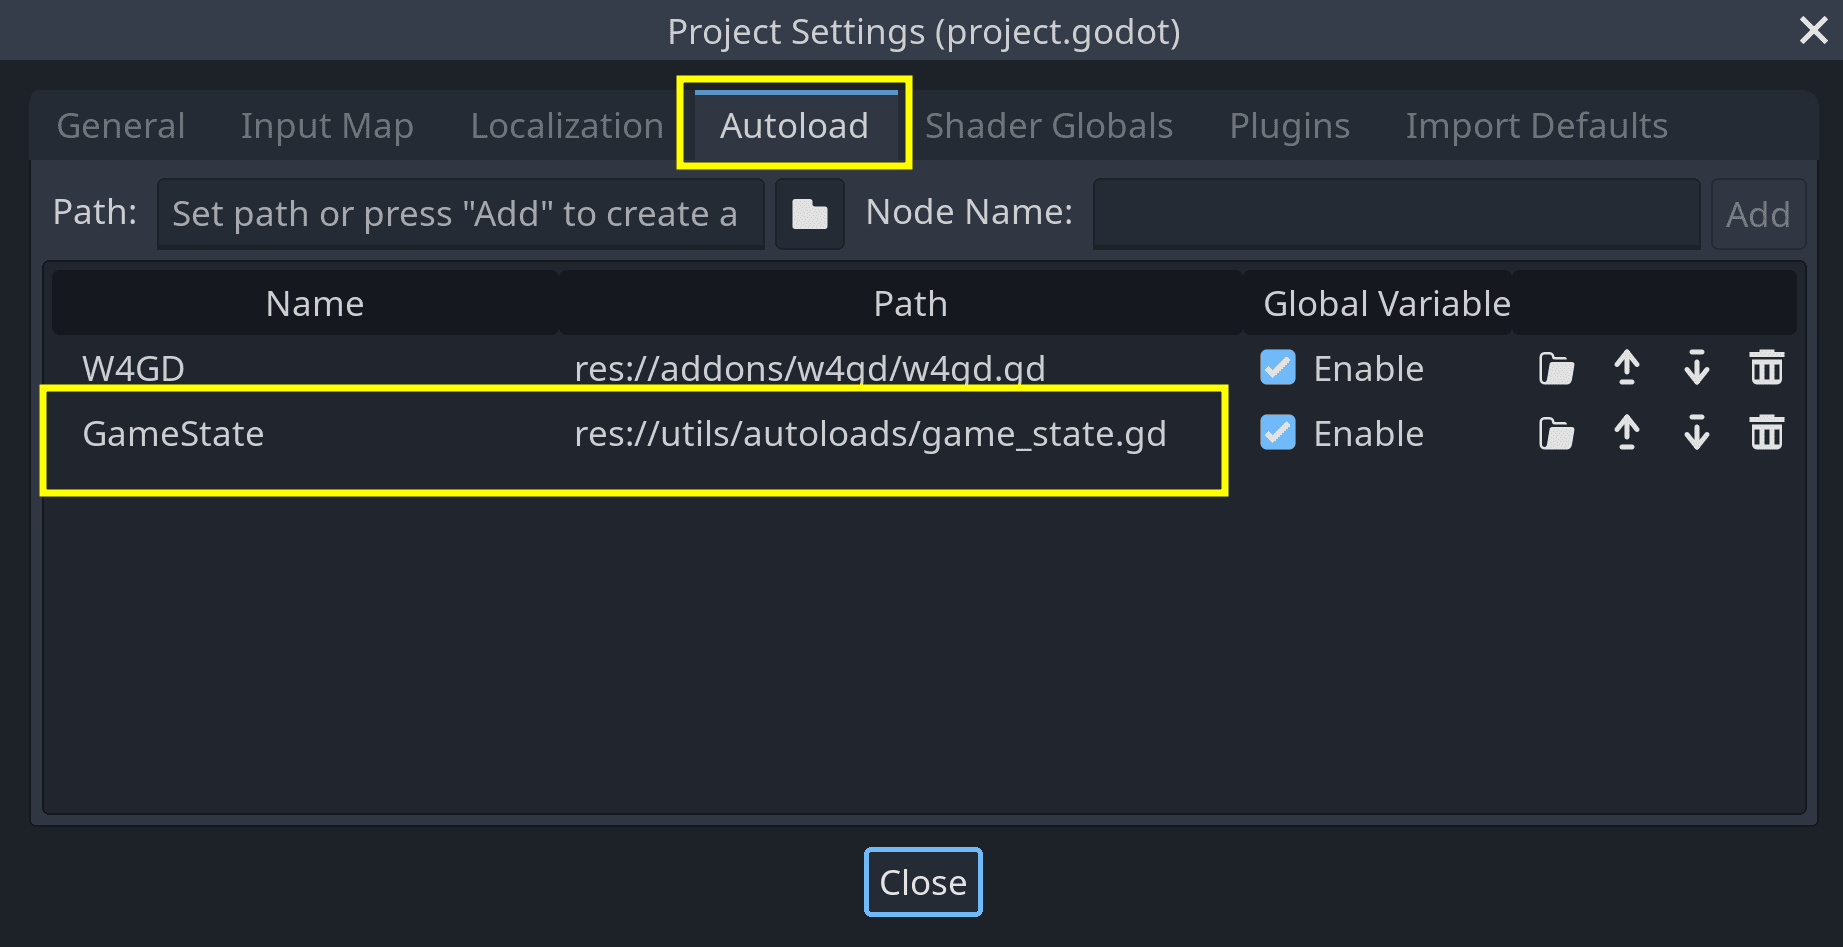
We will mostly be working in the autoloads/game_state.gd script.
This script is registered as an autoload in the start project, so it is
globally available.
It serves as a mediator between W4 and our different game systems and keeps the flow of the code linear to help you follow along in this series.
Note
If you are ever confused, you can compare your code with the file autoloads/game_state-final.gd. It contains the final code we'll have at the end of the series.
It will take some time to get results. There's quite a bit of setup we need to do before we can play the game online, as always with online multiplayer. Hang in there, and good luck!
Open the file autoloads/game_state.gd and let's
dig in.
Creating a W4 Account
Follow the instructions here to create your account and request a workspace. Once that's done, you will have access to the workspace dashboard where you can set up and monitor server data:
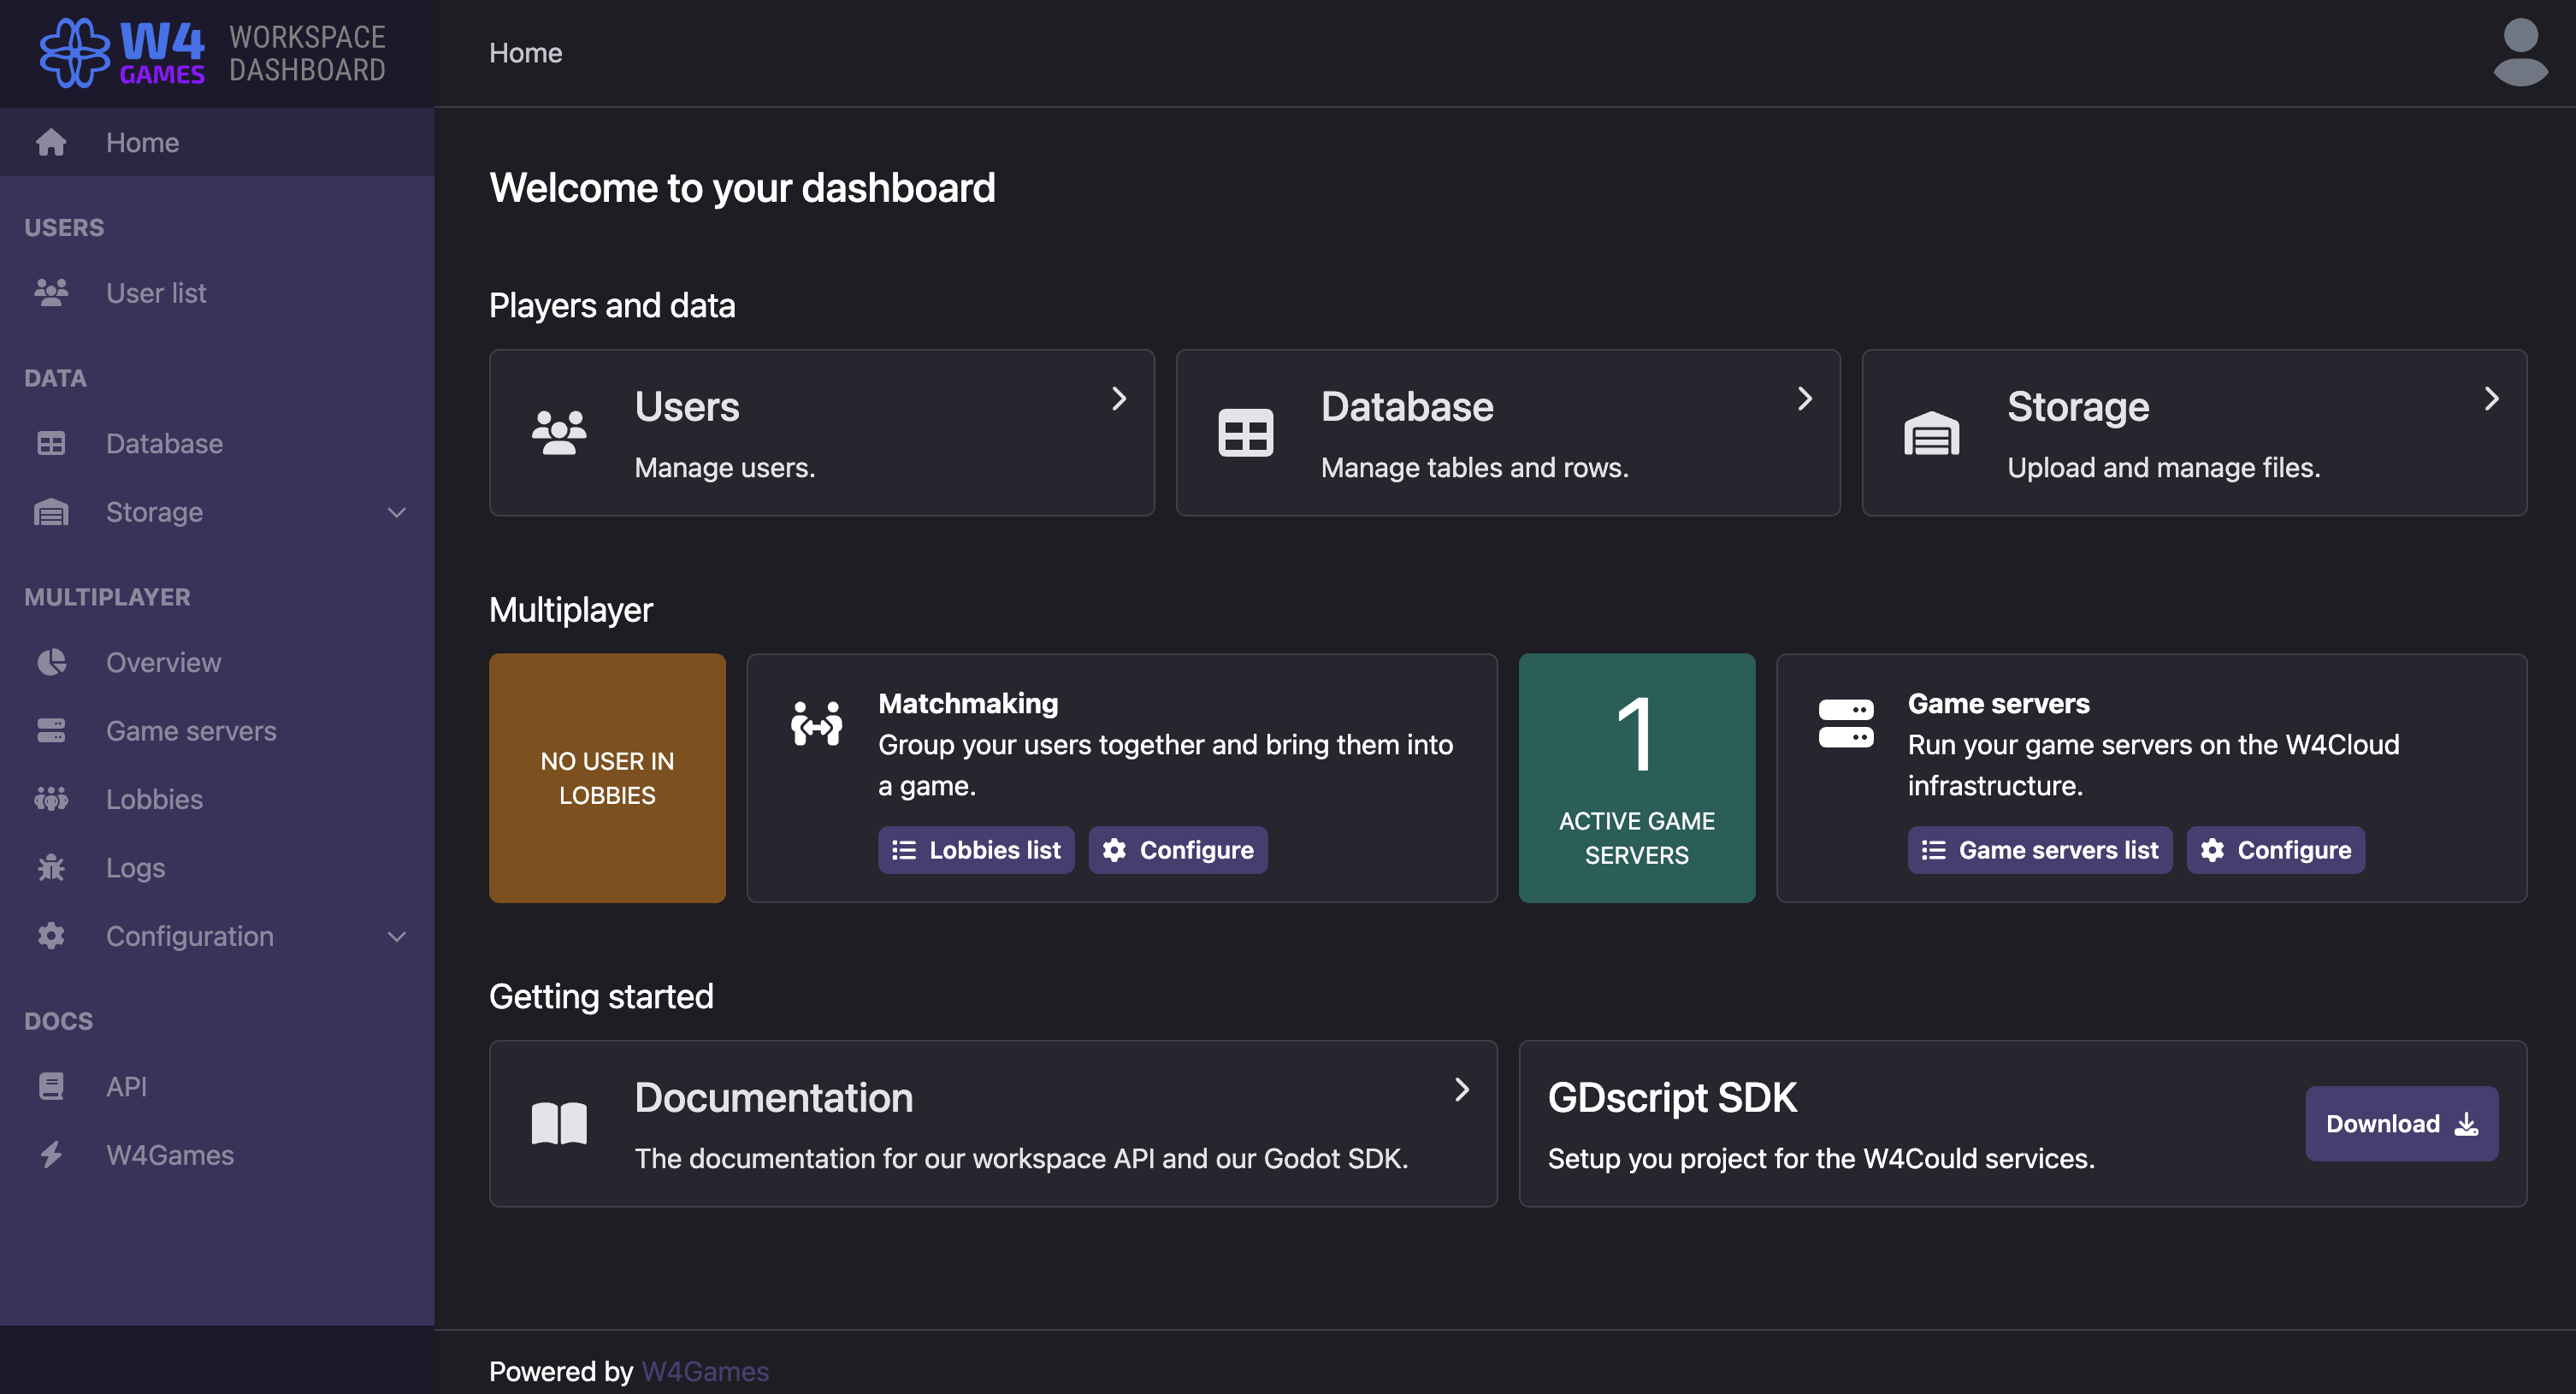
Take note of the following information:
Your unique url. It looks like
<your-domain>.w4games.cloud/dashboardYour W4 Anonymous API Key. You can find it on the API page and save it within your game project's configuration.
Your W4 Service API Key. It's also found on the API page. Be sure to keep it secret and never share it, as it gives access to all of your server's data.
We will need those pieces of information later at different steps in this tutorial. When we need them, we'll tell you where to find them.
Installing the W4 addon
Navigate to the W4 Cloud add-on releases on GitLab or locate the W4GD plugin in the Godot asset library.
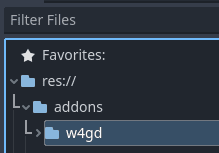
If you downloaded the addon from GitHub, extract the contents of the archive
file in your Godot project. You should end up with an addons/ directory and
a w4gd/ subdirectory inside.
To activate the plugin:
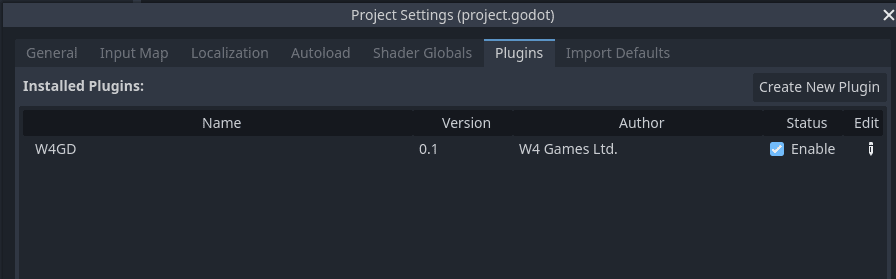
Head to
Project > Project Settings...Click the Plugins tab.
Click the "enable" checkbox to the right of the W4GD plugin to enable it.
After closing the Project Settings window, you should see a new "W4 Cloud" screen at the top of the editor:
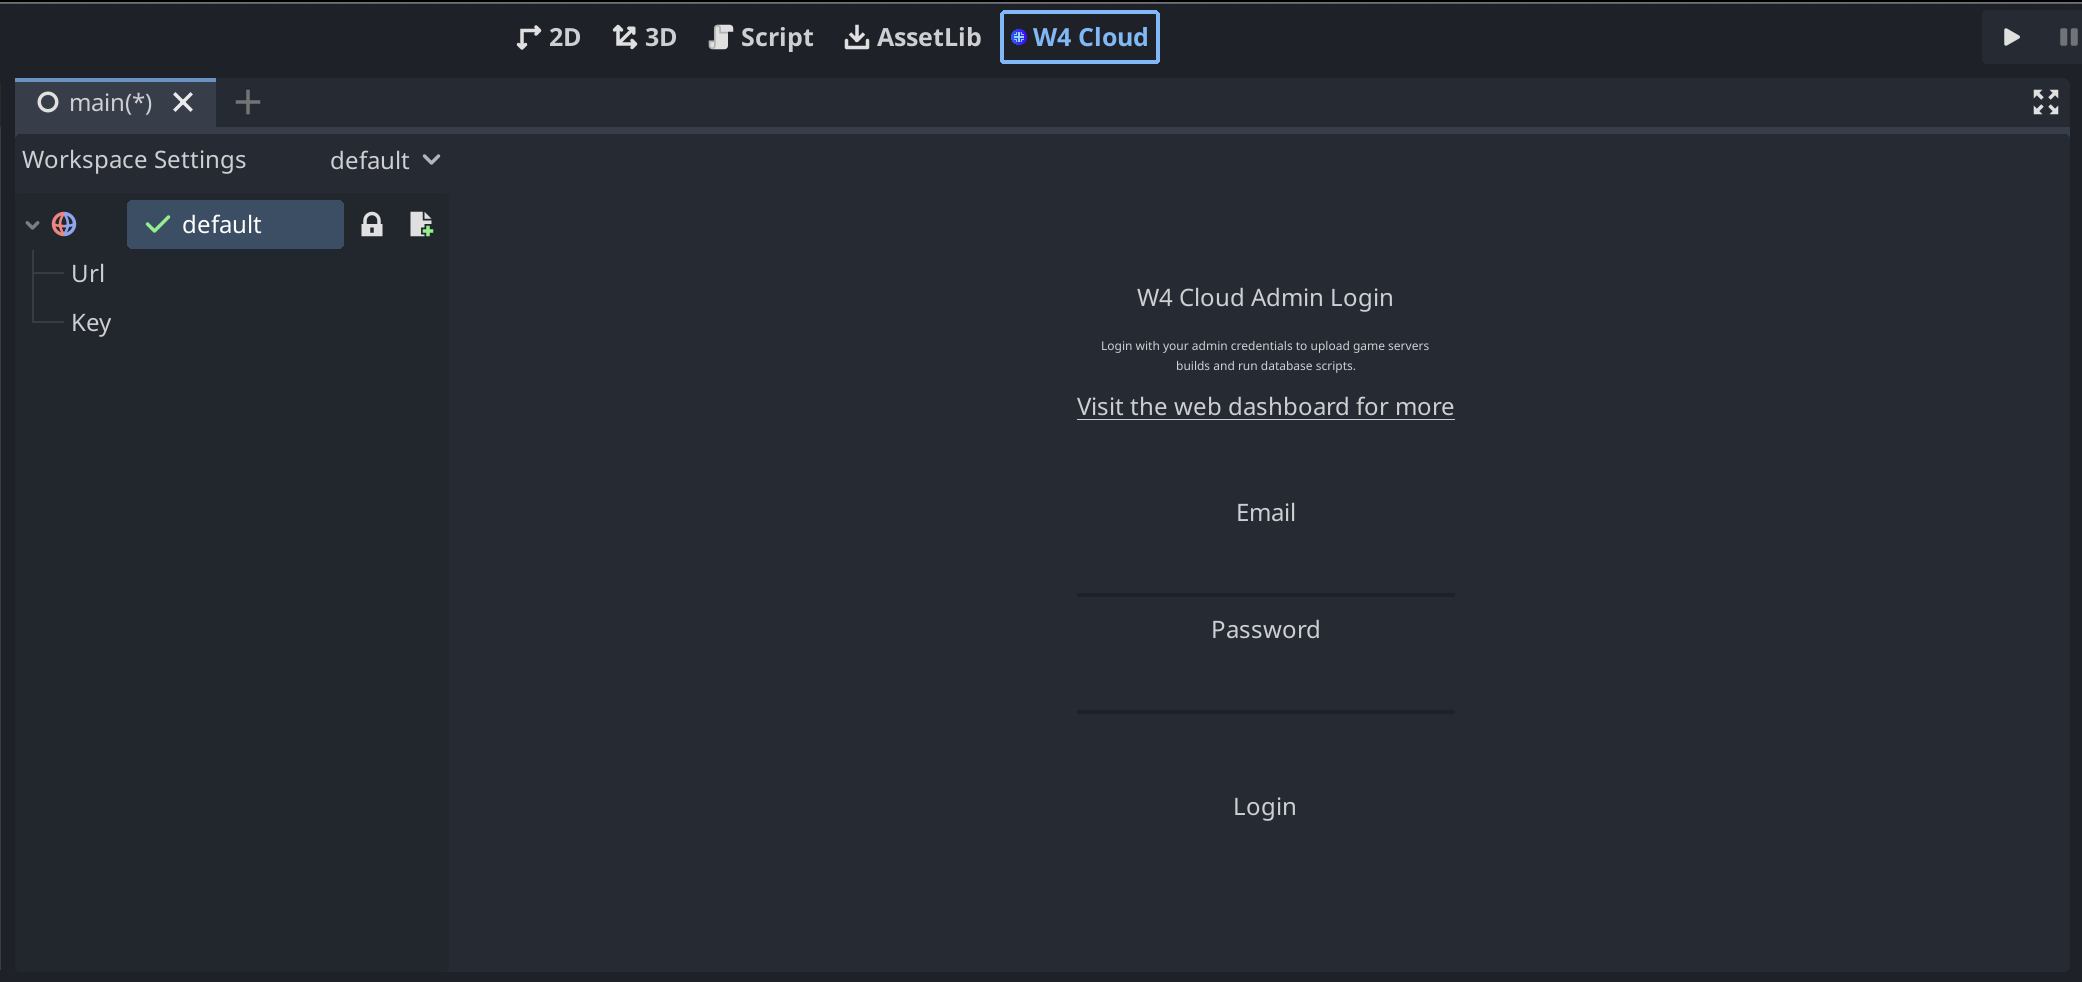
Navigate to the W4 Cloud screen. This is where we will enter our base W4 information to connect to our online dashboard.
Click the lock paddle icon to allow editing. The icon should be open at the top.
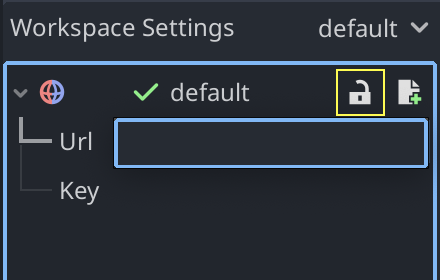
Then, enter your information:
Url: your W4 url, without the
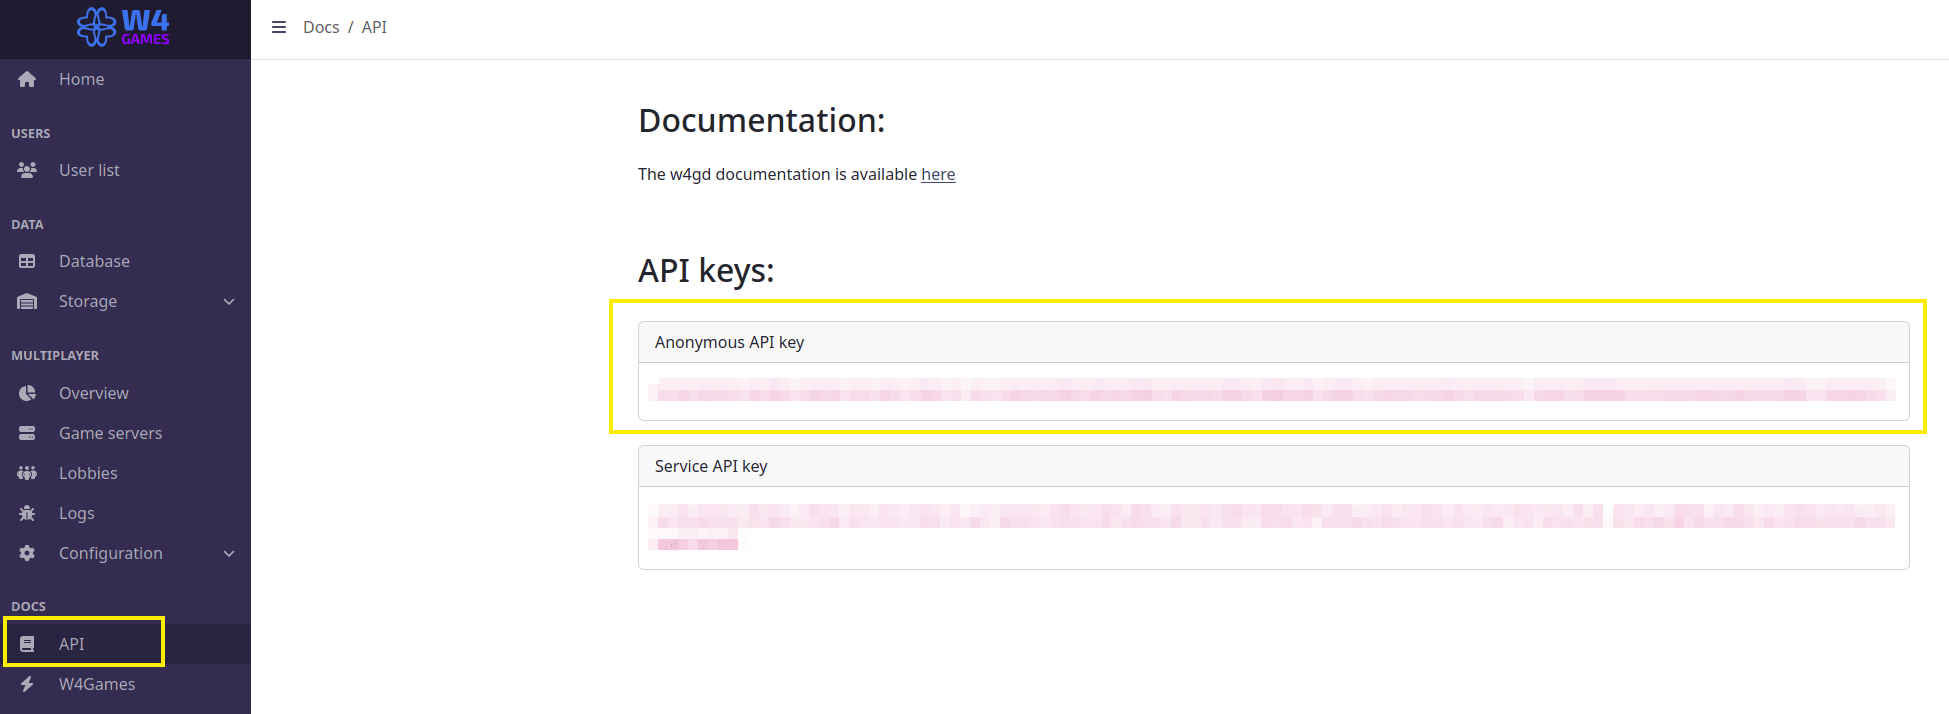
/dashboardpart. For example, if your dashboard is located athttps://amazing-dev.w4games.cloud/dashboard, then your url ishttps://amazing-dev.w4games.cloud/.Key: you will find this as the Anonymous API Key. To access it, from your W4 dashboard, click API in the menu on the left. The anonymous API key gives the addon access to your server's public data.
Warning: For the key, do not use the Service API Key, as it can be used to access your server's private data. Storing the service key in Godot could expose you to data breaches and allow hackers to access your server.
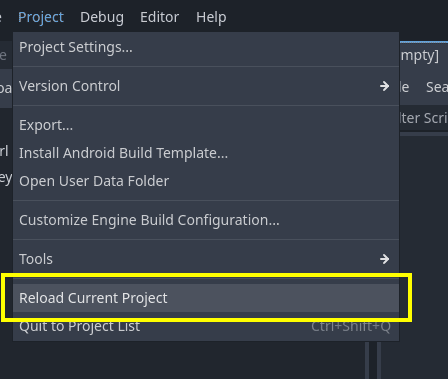
Restart the Godot editor for your changes to take effect. You can use the Project -> Reload Current Project menu option to quickly restart Godot.
If Godot asks you if you want to save modified resources, click yes.
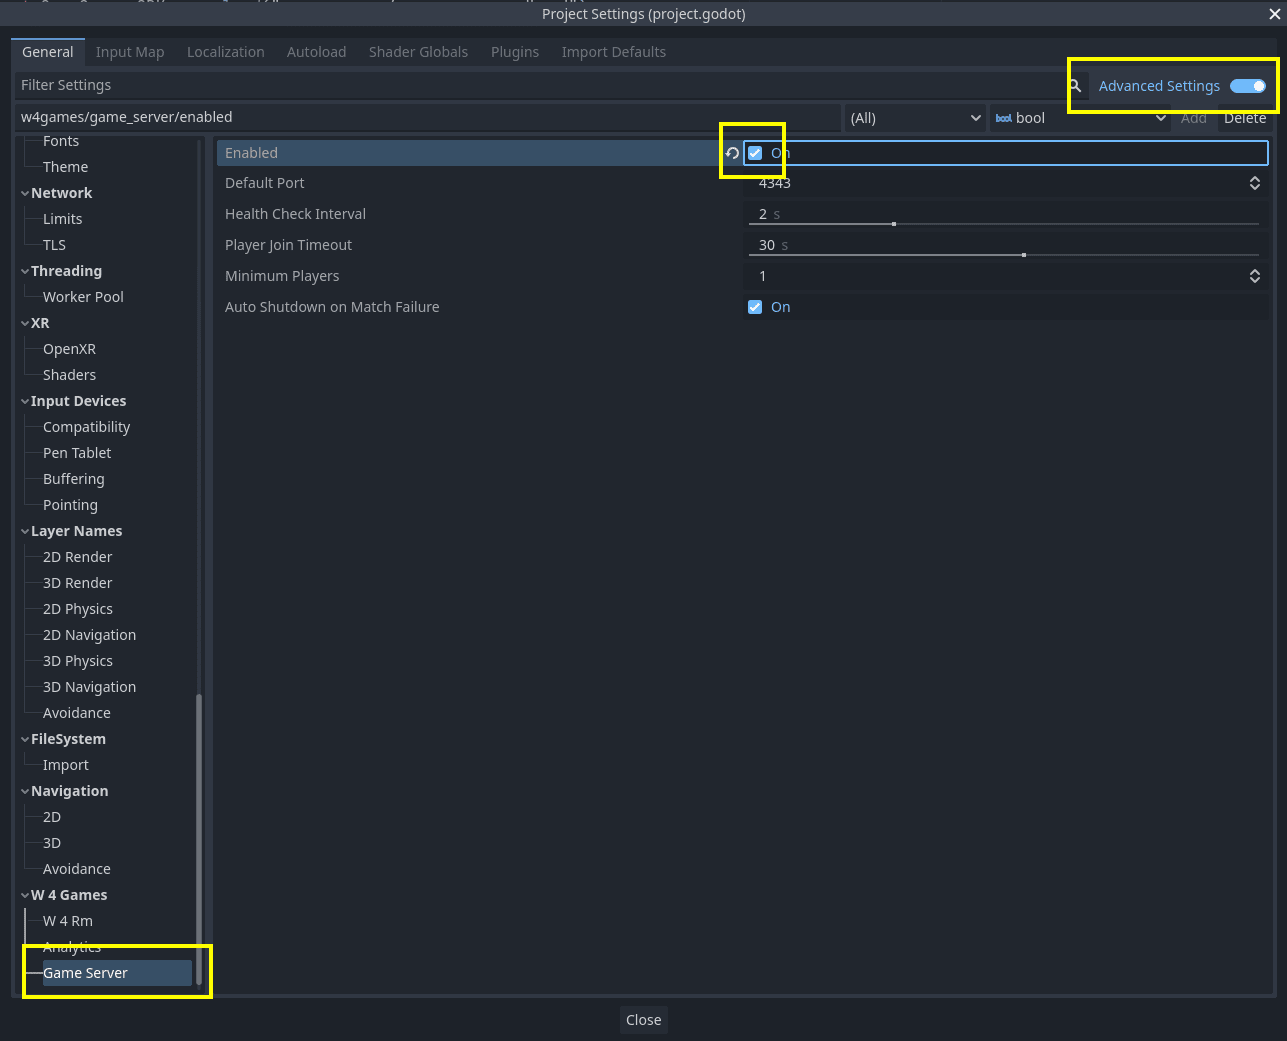
After restarting, head to Project -> Project Settings….
Make sure to turn on Advanced Settings in the top-right of the window. In the
list on the left, scroll down to W4 Games > Game Servers, and check the
Enabled box to enable W4's authoritative servers.
You're set! Next, we will add code to authenticate players.